How to Make a Paper Pumpkin: An Easy Fall Craft for Beginners
Published: 14 Oct 2026
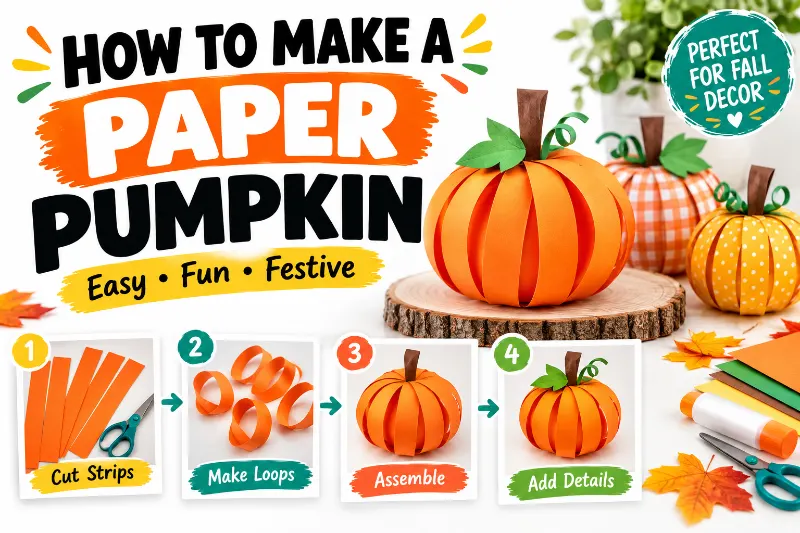
A paper pumpkin is a simple way to add fall charm to your home without spending much money. You can make one with orange paper, scissors, glue, and a few basic craft supplies.
Want to create cute pumpkin decorations for Halloween or Thanksgiving? This step-by-step guide will show you how to make a paper pumpkin, shape its round body, and add a stem, leaf, and curly vine. You can also use these pumpkins for table displays, shelves, and handmade gifts.
How Do You Make a Paper Pumpkin?
To make a paper pumpkin, cut orange paper into equal strips, join the strips at the center, and spread them into a round shape. Secure the ends together, then add a green paper stem, leaf, and vine. The whole craft uses basic supplies and suits beginners, kids with adult help, and adults who enjoy DIY fall decor.
Supplies You Need for a Paper Pumpkin Craft
You do not need special tools to make this easy paper pumpkin. Most supplies may already be in your home, and you can choose simple construction paper for a bright, classic fall look.
- Orange construction paper or cardstock
- Green paper for the stem and leaf
- Scissors, a ruler, and a pencil
- Glue stick or craft glue, plus a small paper clip if needed
Example: For a small pumpkin on a bedroom shelf, use orange construction paper and a green leaf. A medium pumpkin for a family dining table can use thicker cardstock for better support.
Choosing the Right Paper for Your Pumpkin
Paper thickness affects the pumpkin’s shape and strength. Thin paper bends easily, while cardstock holds a round form better. Choose orange, rust, or burnt-orange paper to match your fall decor, and use green paper for natural-looking details.
- Thin paper: Best for small, lightweight decorations.
- Construction paper: A good choice for beginner crafts and kids.
- Cardstock: Better for larger pumpkins that need extra support.
- Patterned paper: Works well for a playful or farmhouse-style display.
Example: A renter decorating a small apartment can use one orange paper pumpkin on a shelf. A family making a craft with children can choose soft construction paper that is easy to cut and fold.
Step-by-Step Guide: How to Make a Paper Pumpkin
The main trick is to cut equal strips and attach them neatly at the center. When you bring the ends together, the strips form a rounded pumpkin shape. Follow these steps slowly for a tidy result.
Step 1: Cut Equal Strips of Orange Paper
Cut orange paper into strips of equal width and length. For a beginner-friendly pumpkin, start with eight strips measuring about 1 inch (2.5 cm) wide and 8 inches (20 cm) long. Keep the edges straight for a balanced shape.
Example: In a small bedroom with a cozy fall style, an 8-inch (20 cm) pumpkin can sit beside a book stack. For a larger display, use longer strips and test the shape before adding glue.
- Mark the measurements with a ruler.
- Cut all strips to the same size.
- Stack them neatly to check their length.
- Ask an adult to help younger children with scissors.
Step 2: Join the Paper Strips at the Center
Arrange the strips in a star or fan pattern so they cross at the same center point. Apply glue between the layers, or use a small paper fastener if you have one. Let the glue set before moving to the next step.
Example: For a simple farmhouse-style craft on a medium coffee table, keep the strips evenly spaced. This helps the pumpkin look balanced when you bring the ends together.
- Align the center points carefully.
- Use only enough glue to hold the paper.
- Press the layers gently together.
- Wait until the center feels secure.
Step 3: Spread the Strips Into a Circle
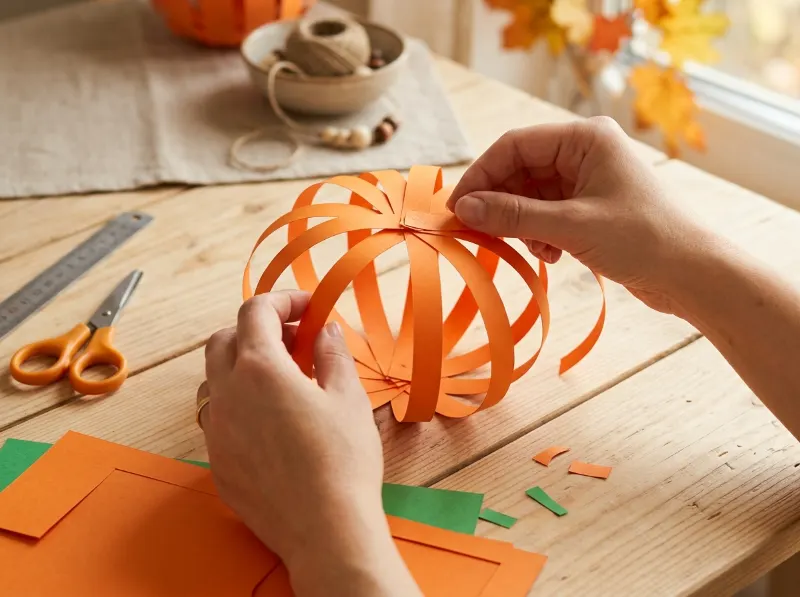
Gently move the strips apart until they form an even circle around the center. Leave similar gaps between each strip. This step creates the pumpkin’s rounded outline and makes it easier to connect the ends neatly.
Example: A small pumpkin for a narrow entryway shelf looks best when its strips form a neat, compact circle. For a playful kids’ craft, the gaps can be slightly uneven without spoiling the decoration.
- Separate the strips one at a time.
- Keep the gaps as even as possible.
- Avoid pulling hard on the glued center.
- Check the circle from the front before continuing.
Step 4: Connect the Ends to Form the Pumpkin
Bring the loose ends of the strips toward one another to create a rounded shape. Glue each end to the matching area on the opposite side. Hold each join briefly, and allow the glue to dry before adding decorations.
Example: For a warm, neutral living room, a burnt-orange pumpkin with a rounded shape works well beside cream-colored books. A small paper clip can hold a join in place while the glue dries.
- Curve the strips gently instead of folding them sharply.
- Attach the ends one at a time.
- Keep the pumpkin balanced as you work.
- Add a little extra glue only where needed.
Step 5: Make a Stem and Attach It
Cut a small rectangle from green or brown paper and roll it into a short tube. Add a little glue to hold its shape, then attach it to the top of the pumpkin. Brown paper creates a natural look, while green adds a fresh touch.
Example: A small pumpkin for a child’s desk can have a short green stem. For a rustic dining room display, choose brown paper and pair the pumpkin with cream and wood tones.
- Cut a rectangle about 1 inch (2.5 cm) wide and 2 inches (5 cm) long.
- Roll it loosely into a tube.
- Glue the edge so it stays closed.
- Attach the stem to the top and let it dry.
Step 6: Add a Leaf and Curly Vine
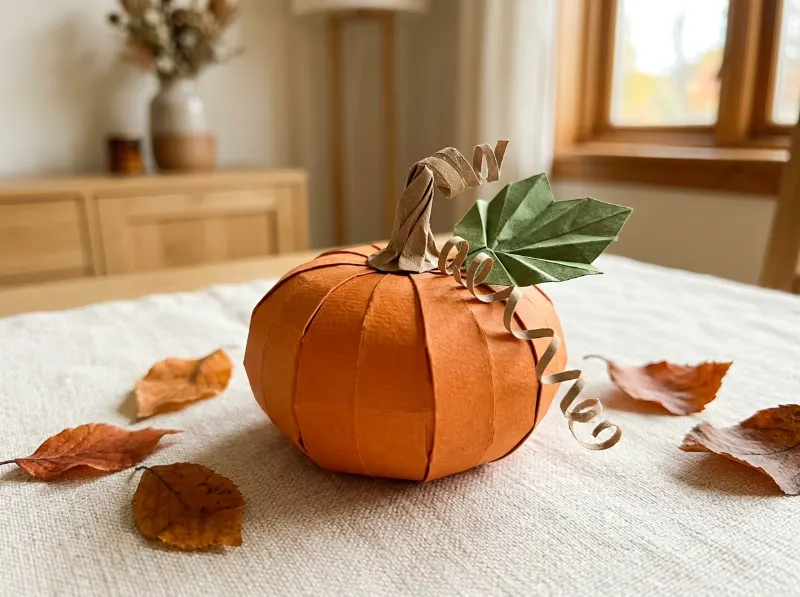
A paper leaf and vine give your pumpkin a finished look. Cut a simple leaf from green paper, fold it lightly down the middle, and attach it beside the stem. Curl a narrow paper strip around a pencil to make a vine.
Example: For a medium fall centerpiece, use a dark green leaf with a burnt-orange pumpkin. In a small rental home, keep the details simple so the decoration stays light and easy to move.
- Cut one leaf about 2 inches (5 cm) long.
- Fold the leaf gently to create a center line.
- Curl a thin green strip around a pencil.
- Glue the leaf and vine near the stem.
Easy Paper Pumpkin Ideas for Different Homes
You can change the paper, size, and finish to match your room. Keep the basic strip method the same, then choose details that suit your style. These simple variations work for fall displays, Halloween crafts, and Thanksgiving table decor.
- Classic fall: Use orange paper with a green stem.
- Modern neutral: Choose cream, tan, or warm white paper.
- Rustic farmhouse: Use burnt-orange paper with a brown stem.
- Playful Halloween: Try black, purple, or patterned paper.
Example: In a small apartment, a cream paper pumpkin can match a neutral shelf. A family dining room can use several orange pumpkins in different sizes for a warm seasonal display.
Try a Mini Paper Pumpkin
A mini pumpkin suits a desk, bookshelf, or small side table. Cut shorter strips and keep the body compact. Small pumpkins also work well as handmade place decorations for a fall meal or family craft day.
Example: Use 4-inch (10 cm) strips for a tiny pumpkin in a small bedroom. Choose rust-orange paper for a cozy look, and keep the stem short so it does not overpower the body.
Make a Larger Paper Pumpkin
Longer strips create a larger decoration, but they also need stronger joins. Use cardstock and let each glued section dry before handling it. A larger pumpkin can work as a centerpiece in a medium or large room.
Example: For a family dining table, try strips about 12 inches (30 cm) long and 1 inch (2.5 cm) wide. Test one pumpkin first because the final size depends on the curve and spacing.
Create a Paper Pumpkin Garland
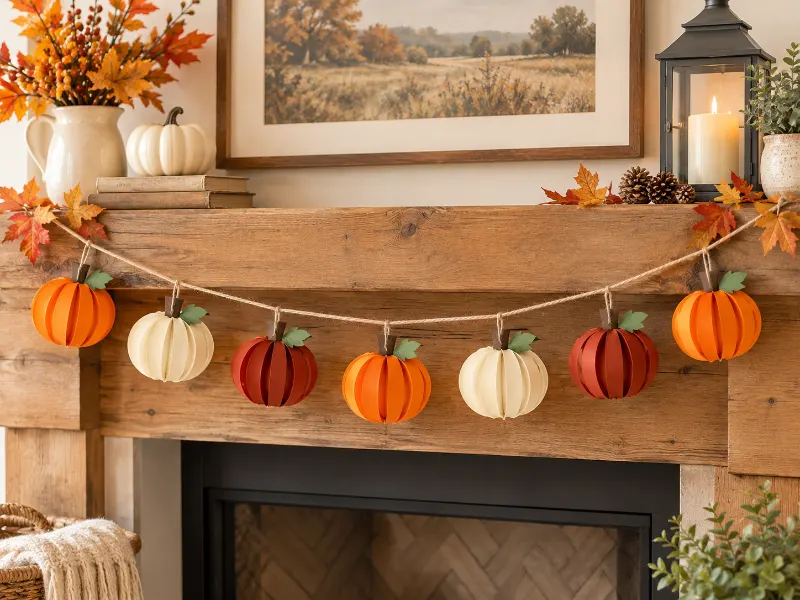
Make several small pumpkins and connect them with string to create a seasonal garland. Use a sturdy thread and leave enough space between each decoration. Hang it on a shelf edge or across a mantel where it will not block walkways.
Example: A renter can hang a lightweight garland from removable hooks on a shelf. For a small living room, use three to five mini pumpkins in orange and cream to avoid a crowded look.
Where Can You Display Handmade Paper Pumpkins?
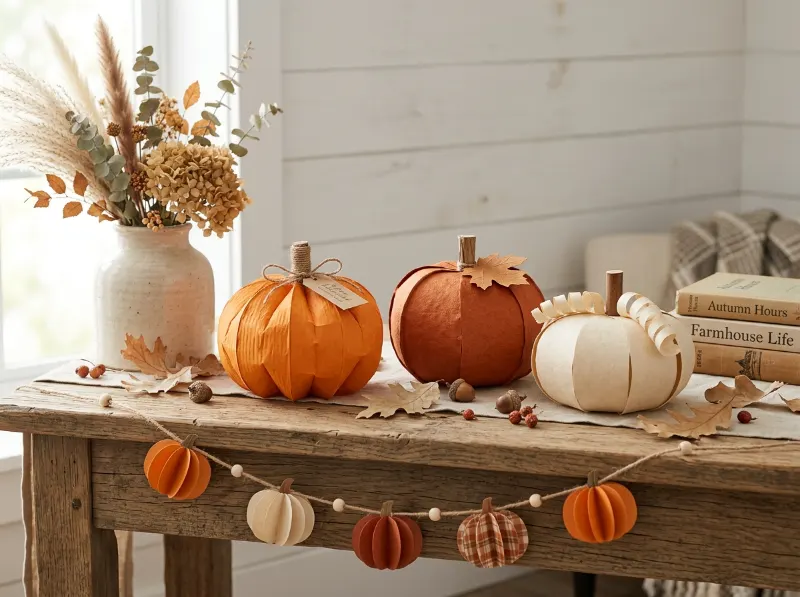
Paper pumpkins look best in dry indoor spaces where they can keep their shape. Choose a spot that gives the craft enough room and keeps it away from spills, open flames, and busy areas. Match the colors to your existing decor for a simple seasonal update.
- Small rooms: Place one mini pumpkin on a desk or shelf.
- Medium rooms: Add two or three pumpkins to a coffee table.
- Large rooms: Group pumpkins of different sizes on a mantel or console.
- Family homes: Display them on a high shelf away from toddlers and pets.
Example: A renter with a small living room can place a cream and orange pumpkin beside a stack of books. A family with pets should choose a stable shelf instead of a low table where the craft may fall.
Use Paper Pumpkins for Halloween and Thanksgiving
Paper pumpkins can stay on display throughout the fall season. Add black paper details for Halloween, or keep the design simple for Thanksgiving. You can also pair them with handmade decorations, such as salt dough Christmas ornaments, when you begin changing your seasonal decor.
Example: A medium dining room can use orange pumpkins for Halloween, then switch to cream, brown, and muted green for Thanksgiving. This small change keeps the same handmade decorations useful for longer.
How to Make Your Paper Pumpkin Look Neat
Small details can make your finished pumpkin look more polished. Take time to check the spacing, glue, and shape before displaying it. You do not need extra supplies to fix most problems, so use what you already have at home.
- Uneven strips: Trim the ends before joining them.
- Loose joints: Add a small amount of glue and let it dry.
- Flat shape: Curve the strips gently to create more volume.
- Wobbly pumpkin: Adjust the strips until the body sits evenly.
Example: For a neat pumpkin on a small entryway shelf, use matching orange strips and a short stem. A casual craft for kids can have a less even shape and still look charming.
What to Do if the Pumpkin Falls Apart
Loose ends often come from weak glue or paper that bends too much. Hold each join in place until it sets. If thin paper keeps tearing, remake the pumpkin with cardstock or shorten the strips.
Example: A medium pumpkin for a family table may need thicker paper to hold its round shape. A renter making small shelf decorations can use construction paper and a little extra drying time.
How Much Does This Paper Pumpkin Craft Cost?
This craft can use supplies you already own, so your cost depends on what you need to buy. Check the price of paper and glue before shopping. Reusing leftover craft materials can help you keep your fall decorating budget low.
| Budget level | What to use | Best for |
| Low | Scrap paper, leftover glue, reused cardboard | Small crafts and kids |
| Medium | New construction paper and basic craft supplies | Matching pumpkins for shelves |
| High | Decorative cardstock and extra craft materials | Coordinated seasonal displays |
Example: A beginner decorating a small bedroom can start with leftover orange paper. Someone creating a large fall display may choose several paper colors, but should check current prices before setting a budget.
Make Your Craft Budget Go Further
Plan the size and number of pumpkins before cutting the paper. Use leftover strips for mini pumpkins, leaves, or a garland. If you enjoy seasonal DIY projects, you can also explore Christmas decor that still looks good after Christmas for ideas that work beyond one holiday.
Example: A family with a medium living room can make three small pumpkins from leftover craft supplies instead of buying new decorations. Use orange, cream, and brown paper to create a matching group.
Frequently Asked Questions About Paper Pumpkins
What Paper Works Best for a Paper Pumpkin?
Construction paper works well for most beginner crafts because it is easy to cut and shape. Cardstock offers more support for larger pumpkins. Choose paper that bends without tearing and suits the size you want to make.
Can Kids Make Paper Pumpkins?
Yes, kids can make paper pumpkins with adult supervision. An adult should help with scissors when needed and handle any hot glue. Younger children can arrange paper strips, choose colors, and attach lightweight decorations with a glue stick.
How Do I Make a Paper Pumpkin Without Glue?
You can use paper fasteners or small pieces of tape to hold the strips together. The result may look slightly different from a glued pumpkin. Test the joins before adding the stem and leaf so the shape stays secure.
How Can I Make a Paper Pumpkin Bigger?
Use longer strips and slightly stronger paper to create a larger pumpkin. Start with strips around 12 inches (30 cm) long, then adjust the spacing and curve. Make one test version first because the final size depends on how you shape it.
Can I Keep Paper Pumpkins for Next Year?
Yes, you can reuse paper pumpkins if you store them in a dry place away from direct sunlight and moisture. Place them in a box with enough room to protect their shape. Repair loose strips before storing the decoration.
More Ways to Style Your Fall Display
Pair your paper pumpkins with simple items you already own. A small plant can add a touch of green, while a fall porch display can extend the same colors outside. For a cozy evening at home, try ideas from this guide to making wax melts at home. Keep any scented products away from paper decorations and follow their safety instructions.
Example: A medium living room can combine two paper pumpkins, a small plant, and a neutral vase on a shelf. In a home with pets, place the display out of reach and avoid loose pieces that pets may chew.
For more natural touches, explore these bedroom plants or try these Halloween front porch ideas for a matching seasonal look.
Final Thoughts
A paper pumpkin is an easy way to decorate your home for fall with simple supplies. Cut even strips, join them at the center, shape the body, and add a stem and leaf. Choose colors and sizes that fit your space and budget.
Start with one small pumpkin before making a matching set. You can use it on a shelf, desk, or table, then try a garland when you feel ready for another project.
Which paper pumpkin style would you make first: classic orange, neutral farmhouse, or colorful Halloween?


- Be Respectful
- Stay Relevant
- Stay Positive
- True Feedback
- Encourage Discussion
- Avoid Spamming
- No Fake News
- Don't Copy-Paste
- No Personal Attacks
- Be Respectful
- Stay Relevant
- Stay Positive
- True Feedback
- Encourage Discussion
- Avoid Spamming
- No Fake News
- Don't Copy-Paste
- No Personal Attacks
