How to Make Salt Dough Christmas Ornaments
Published: 14 Sep 2026

Salt dough Christmas ornaments are a simple way to add a personal touch to your Christmas tree. You only need a few kitchen items, some cookie cutters, and a little creativity. Kids can also help with shaping, painting, and decorating these homemade ornaments.
These DIY Christmas ornaments work well for family craft days, holiday parties, and handmade gifts. You can make stars, trees, hearts, snowflakes, and other shapes. Add names or dates to create keepsakes that your family can enjoy for many Christmas seasons.
Why Salt Dough Makes Great Christmas Decorations
Salt dough is a simple homemade dough made with flour, salt, and water. After shaping the dough, you dry it in the oven until it becomes firm. Once it cools, you can paint and decorate it in many different ways.
These ornaments are also budget-friendly. Most homes already have the basic ingredients. You can make many pieces from one batch, so this project works well for large families. It also gives children a fun way to take part in Christmas decorating.
What makes them a good choice?
- Easy to make at home
- Low-cost craft project
- Great for children
- Easy to paint
- Perfect for personalized gifts
- Useful for Christmas tree decor
- Can become family keepsakes
Gather Your Supplies Before You Start
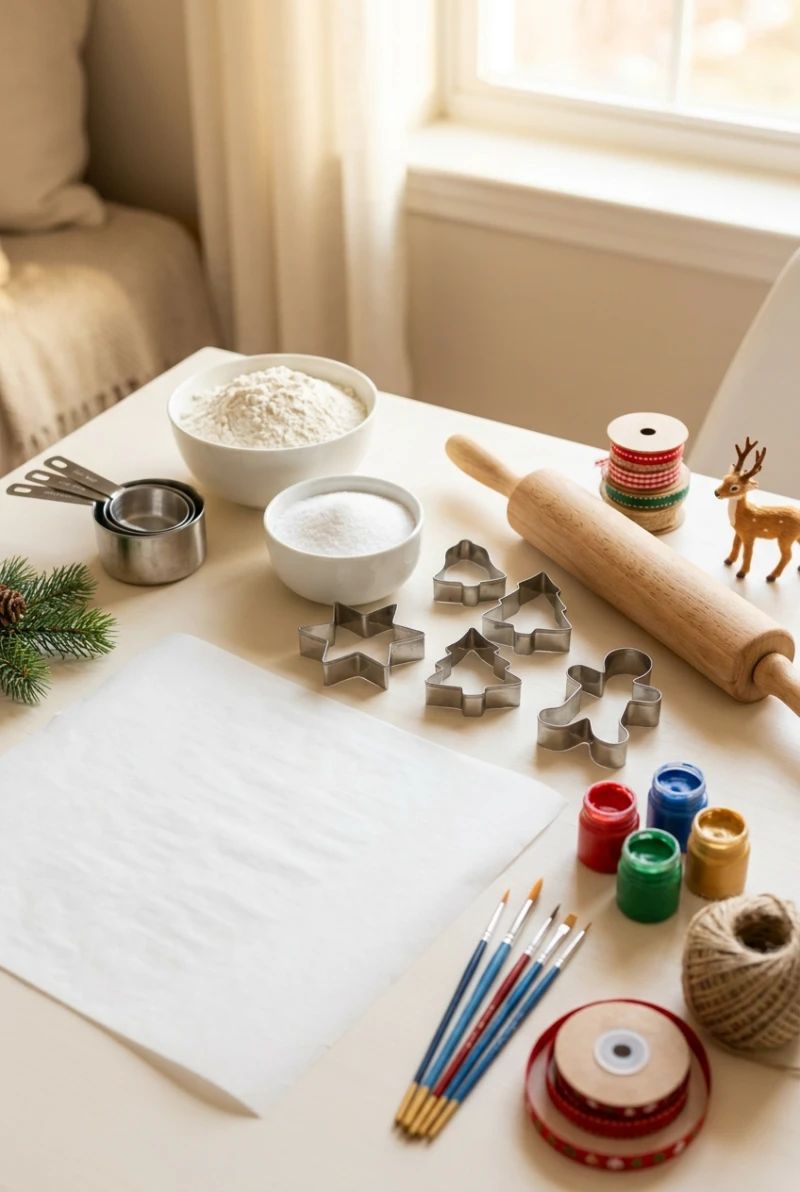
A good craft project starts with simple preparation. Measure your ingredients before mixing the dough. You will also need a flat surface for rolling, cookie cutters for shapes, and a baking tray for drying the ornaments.
Keep your decorating supplies nearby before you begin. Paint, brushes, ribbon, and markers can turn plain dough shapes into colorful Christmas decorations. If children are helping, cover your work surface with paper or a washable mat.
You will need:
- 2 cups all-purpose flour
- 1 cup table salt
- About ¾ cup warm water
- Mixing bowl
- Rolling pin
- Cookie cutters
- Baking sheet
- Parchment paper
- Straw or skewer
- Acrylic or craft paint
- Small paintbrushes
- Ribbon or twine
Make a Simple Salt Dough Mixture
The dough needs the right balance of flour, salt, and water. Start by mixing the flour and salt in a large bowl. Add water slowly while stirring. Stop adding water when the mixture starts to come together.
Knead the dough on a lightly floured surface for a few minutes. It should feel smooth and firm, not sticky. If the dough feels too wet, add a little flour. If it feels dry or cracks easily, add a few drops of water.
Easy Salt Dough Recipe
- 2 cups flour
- 1 cup salt
- ¾ cup warm water
Mix the ingredients until they form a soft dough. Knead it until smooth before rolling it out.
Shape the Dough Into Christmas Designs
Place the dough on a flat surface and roll it evenly. Aim for about ¼ inch thickness. Dough that is too thin can break easily, while very thick pieces take longer to dry.
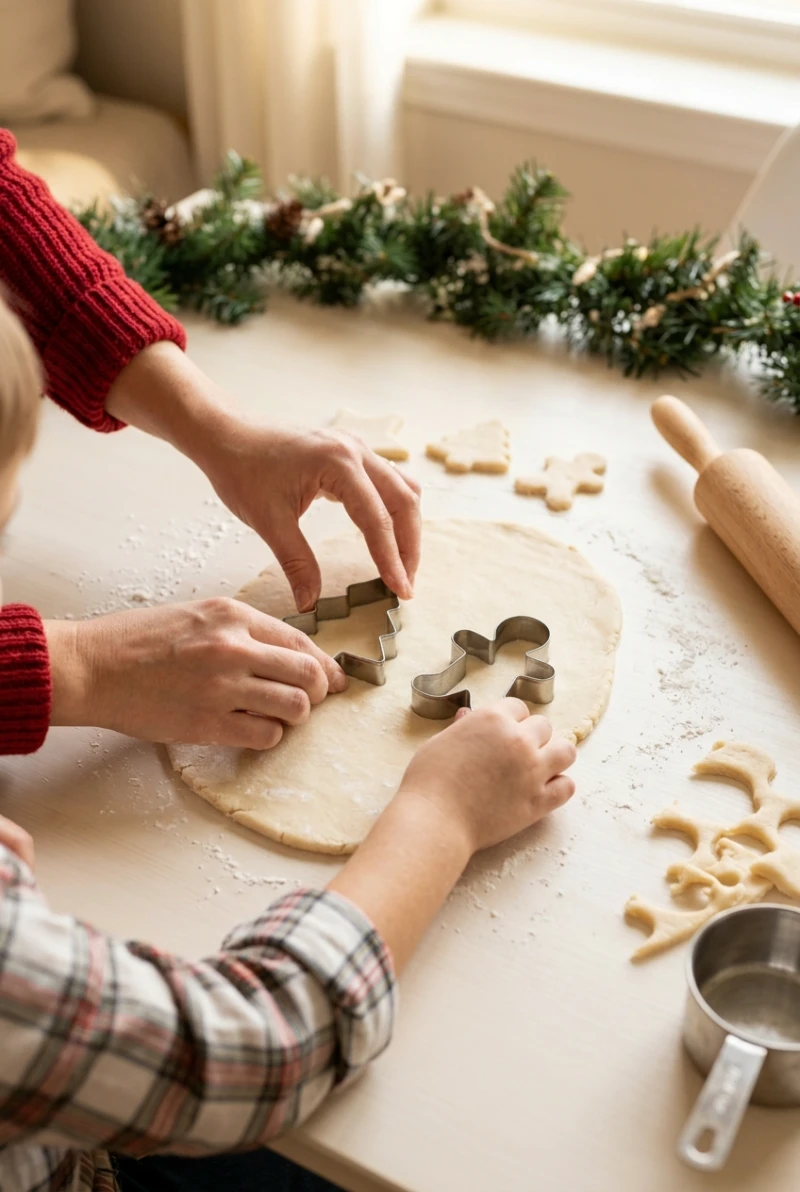
Use Christmas cookie cutters to create your favorite shapes. Stars, Christmas trees, bells, gingerbread people, snowflakes, and hearts are easy choices. Press the cutter firmly into the dough and lift the shape carefully.
Try Different Ornament Shapes
You can make your ornaments match your Christmas theme.
- Christmas trees
- Stars
- Snowflakes
- Hearts
- Bells
- Gingerbread people
- Mittens
- Reindeer
- Angels
- Candy canes
Add Personal Details Before Baking
Plain salt dough ornaments already look cute, but small details can make them special. Press a small branch, lace pattern, leaf, or textured object into the dough before baking. This creates a simple raised or pressed design.
You can also personalize each piece while the dough is still soft. Press a name, initial, or year into the surface. A child’s handprint can also make a meaningful family keepsake when the dough size allows it.
Easy texture ideas:
- Pine branches
- Lace
- Small leaves
- Knitted fabric
- Star patterns
- Christmas stamps
- Small letter stamps
Make the Hanging Hole
Do not forget the hole for the ribbon. Use a straw or the end of a wooden skewer to make a small hole near the top of each ornament. Make the hole before baking.
Keep the hole far enough from the edge so it does not break. Check each piece before placing it on the baking sheet. A clean hole will make hanging the finished ornament much easier.
Dry the Ornaments Without Cracks
Place the shaped ornaments on a parchment-lined baking sheet. Bake them at a low temperature so the dough dries slowly. A slow baking process helps the ornaments become firm without causing too much browning.
Oven temperatures can vary, so keep an eye on the ornaments. Smaller pieces may finish sooner than larger ones. Let them cool completely after baking. They should feel hard and dry before you start painting.

Paint the Finished Ornaments
Let the ornaments cool completely before painting. Acrylic craft paint works well because it gives good color coverage and dries fairly quickly. Use a small brush for edges and tiny details.
Start with a base color and let it dry before adding another layer. You can keep the design simple with white and gold or create colorful ornaments for a playful Christmas tree.
Simple Painting Ideas
- White snowflakes
- Red and green Christmas trees
- Gold stars
- White and red candy canes
- Brown gingerbread people
- Silver snowflakes
- Personalized names
- Small dots and stripes

Add a Protective Finish
Paint gives your ornaments color, but a protective finish can help keep the surface looking fresh. Once the paint has dried fully, apply a clear craft sealer if you want extra protection.
Use the sealer in a well-ventilated area and follow the product instructions. Give the ornaments enough drying time before adding ribbons. A clear finish can also give the pieces a soft matte or glossy look.
Choose the finish based on your style:
- Matte: Soft and simple appearance
- Glossy: Shiny and bright appearance
- Satin: A gentle middle option
Turn Them Into Personalized Christmas Keepsakes
Personalized salt dough ornaments can hold special memories for years. Add a child’s name and the current year to mark a special Christmas. You can also make one ornament for each family member.
Try adding small details that represent the year. A new baby’s name, a first Christmas message, or a simple family date can make the ornament more meaningful. These small details turn a basic craft into a personal keepsake.

Hang Your Homemade Ornaments
Once the ornaments are completely dry, thread ribbon or twine through the small hole. Tie a secure knot or small bow so the ornament stays safely on the tree.
Choose ribbon that matches your Christmas decor. Natural twine works well for a farmhouse look. Red ribbon gives a traditional Christmas feel. White or neutral ribbon creates a simple and modern appearance.
Hanging ideas:
- Use red velvet ribbon for a classic tree.
- Try jute twine for farmhouse decor.
- Use white ribbon for a soft winter theme.
- Add wooden beads for extra detail.
- Hang smaller pieces on gift packages.
Use Salt Dough Ornaments as Handmade Gifts
Homemade ornaments make thoughtful Christmas gifts because they show time and care. You can make a small collection for grandparents, teachers, friends, or neighbors. A few personalized pieces can feel more special than a store-bought decoration.
Package each ornament carefully before giving it away. Wrap the pieces in tissue paper and place them inside a small gift box. Add a simple gift tag with the recipient’s name for a personal touch.

Fix Common Salt Dough Problems
Salt dough usually works well, but small problems can happen during mixing, shaping, or baking. Cracks often come from dough that is too dry or from pieces that are too thick. Uneven thickness can also make some parts dry faster than others.
Do not worry if your first batch is not perfect. Small surface marks can often disappear under paint. Work slowly and check the dough as you go. Good preparation makes the final ornaments much easier to handle.
Common Problems and Simple Fixes
| Problem | Simple Fix |
| Dough feels sticky | Add a little flour |
| Dough feels dry | Add a few drops of water |
| Ornaments crack | Knead the dough well |
| Pieces break | Make them slightly thicker |
| Shapes lose detail | Roll the dough evenly |
| Paint looks uneven | Add another thin coat |
| Ornament bends | Dry it longer |
| Hanging hole closes | Make the hole slightly wider |
Store the Ornaments for Next Christmas
Store salt dough ornaments only after they are completely dry. Moisture can damage them over time. Keep them in a dry place away from damp rooms, direct water, and high humidity.
Wrap each ornament in tissue paper or soft paper before placing it in a storage box. Do not pack heavy decorations on top of them. Careful storage can help your handmade ornaments last from one Christmas to the next.
Storage tips:
- Use a dry storage box.
- Wrap delicate pieces separately.
- Keep them away from water.
- Do not place heavy items on top.
- Check ornaments before storing them again.
- Store the box in a cool, dry area.
Easy Ways to Make Your Ornaments Look Better
Simple design choices can make homemade ornaments look polished. Keep the shapes clean and avoid adding too many decorations. A few small details often look better than a crowded design.
You can also create one color theme for the whole batch. For example, use white, beige, and gold for a calm tree. Use red, green, and white for a traditional Christmas style. Matching colors can make handmade pieces look more coordinated.
Try These Simple Design Ideas
- Add tiny white dots like snow.
- Paint edges with gold.
- Use two colors on each ornament.
- Add a simple bow.
- Write the year on the back.
- Press natural textures into the dough.
- Mix matte and glossy finishes.

Tips for Making Salt Dough Ornaments With Kids
Salt dough is a fun Christmas craft for children because they can take part in many steps. Kids can mix the dough, choose cookie cutter shapes, press textures, and paint the dried ornaments.
Give younger children simple tasks that match their age. An adult should handle the hot baking tray and oven. Keep the activity relaxed and let children enjoy making their own designs instead of trying to make every piece perfect.
Kid-friendly activities include:
- Choosing ornament shapes
- Rolling the dough
- Cutting simple shapes
- Adding textures
- Painting
- Choosing ribbon colors
- Adding names with help
Frequently Asked Questions
How long does salt dough take to dry?
Drying time depends on the thickness and oven temperature. Thin ornaments dry faster, while thick pieces need more time. The finished ornaments should feel hard and dry all the way through before painting.
Can I make salt dough ornaments without an oven?
Yes, you can air-dry them, but the process takes longer. Place the ornaments on a flat surface and turn them from time to time. Keep them in a dry area until they become firm.
Why do my salt dough ornaments puff up?
Puffing can happen when the dough contains too much water or the oven temperature is too high. Use the correct ingredient balance and dry the ornaments slowly at a low temperature.
How thick should Christmas ornaments be?
About ¼ inch is a good starting point. This gives the ornaments enough strength without making them too thick. Try to keep all pieces at a similar thickness so they dry evenly.
How can I make salt dough ornaments last longer?
Make sure the ornaments are completely dry before painting and storing them. A clear protective sealer can add another layer of protection. Store finished pieces in a dry box away from moisture.
Final Thoughts
Making salt dough Christmas ornaments is an easy holiday craft that brings the family together. With flour, salt, water, and a few basic craft supplies, you can create decorations that feel personal and special.
Try different shapes, textures, colors, and names to make each ornament your own. Whether you hang them on your Christmas tree or give them as handmade gifts, these simple decorations can become part of your family’s Christmas traditions.






- Be Respectful
- Stay Relevant
- Stay Positive
- True Feedback
- Encourage Discussion
- Avoid Spamming
- No Fake News
- Don't Copy-Paste
- No Personal Attacks
- Be Respectful
- Stay Relevant
- Stay Positive
- True Feedback
- Encourage Discussion
- Avoid Spamming
- No Fake News
- Don't Copy-Paste
- No Personal Attacks
