Halloween Origami Ideas for Kids: Easy Paper Crafts for Spooky Fun
Published: 17 Oct 2026
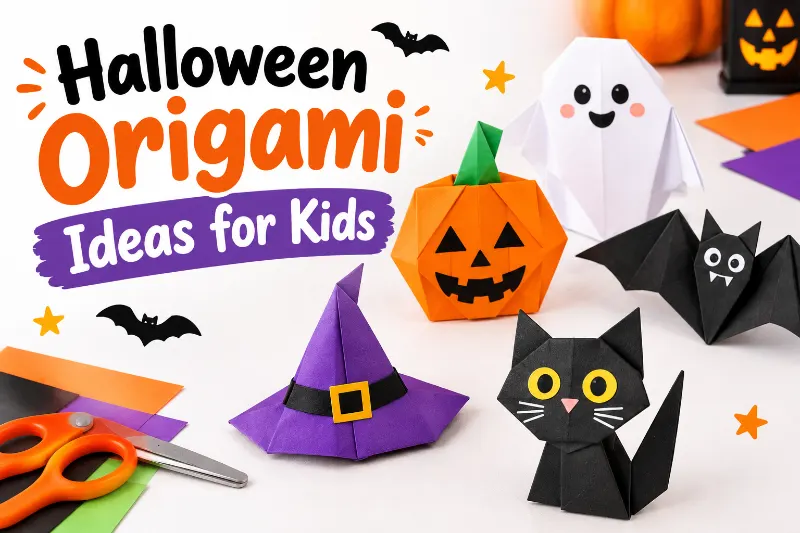
Halloween is a great time for kids to make fun decorations, but craft supplies can cost money and messy projects can take too much time. Halloween origami ideas for kids offer a simple way to turn paper into spooky decorations, cute characters, and playful gifts.
These paper crafts suit beginners, school activities, and family craft time. Do your kids want to fold a little ghost, a scary bat, or a funny pumpkin? This guide shares easy projects, clear folding tips, and creative ways to display each finished design.
What Are the Best Halloween Origami Ideas for Kids?
The best beginner projects include paper ghosts, pumpkins, bats, black cats, and simple spiders. Kids can make these crafts with square paper, markers, and a few basic supplies. Start with easy folds, choose child-safe materials, and let children decorate their own creations.
Why Kids Enjoy Making Halloween Origami
Origami turns a plain sheet of paper into something fun with a few simple folds. It helps children practice patience, follow steps, and use their imagination. Parents can also enjoy an affordable activity without buying many special supplies.
- Builds fine motor skills: Small folds help children practice hand control.
- Encourages creativity: Kids can choose colors, faces, and spooky details.
- Costs less: Reuse paper from old craft projects when possible.
- Keeps kids busy: A small collection of projects can fill a rainy afternoon.
A Fun Activity for Different Ages
Children of different ages can enjoy paper folding with the right level of help. Younger kids can decorate pre-folded shapes, while older children can follow diagrams and make more detailed models. Adults can help with tricky folds without taking over the project.
A Simple Way to Spend Time Together
Family craft time gives everyone a chance to create something together. One person can fold a bat, another can make a ghost, and everyone can decorate the finished pieces. These small projects also work well for classroom activities and playdates.
Supplies to Gather Before You Start
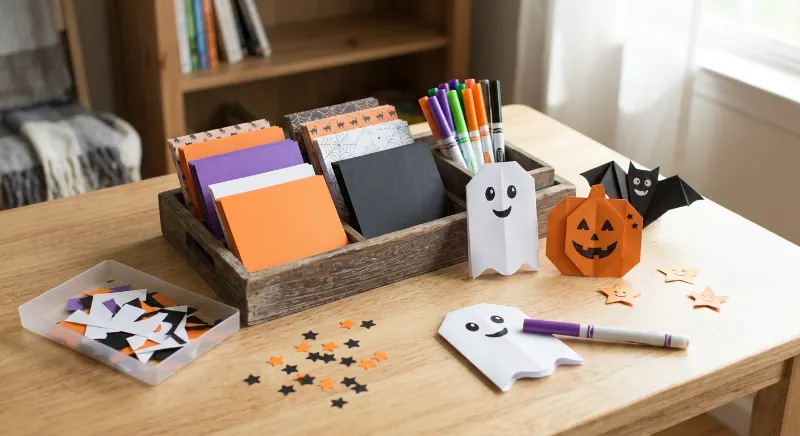
Most easy Halloween paper crafts need only a few basic supplies. Set everything on a table before you begin so children can focus on folding instead of searching for materials. Choose paper that bends easily and holds its shape.
- Square origami paper or paper cut into squares.
- Washable markers, crayons, or colored pencils.
- Child-safe scissors for adult-supervised cutting.
- Glue sticks and small paper scraps for decorations.

Choose the Right Paper Size
Paper size affects how easy a model is to fold. A square measuring 6 × 6 inches (15.2 × 15.2 cm) works well for many beginner designs. Larger paper can help younger children see each fold more clearly.
Pick Colors That Match Halloween
Orange, black, purple, green, and white make a simple Halloween color palette. Orange works well for pumpkins, black suits bats and cats, and white creates friendly ghosts. Let kids mix colors for a playful look instead of making every craft scary.
Easy Halloween Origami Ideas for Beginners
Start with shapes that use simple folds and need little or no cutting. These beginner-friendly Halloween origami ideas help children build confidence before they try more detailed models. Keep the first project short and celebrate each finished design.
- Try one model at a time.
- Show each fold slowly before kids copy it.
- Use a flat table to keep paper steady.
- Let children draw faces after folding.
1. Make a Friendly Paper Ghost
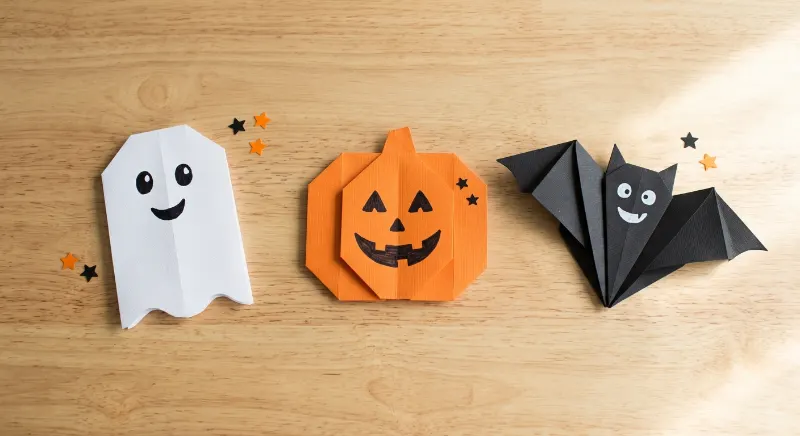
A folded paper ghost is a great first project because children can give it a happy, silly, or spooky face. Use white square paper and a black marker. For an easier version, adults can prepare the shape before younger kids decorate it.
How to make it:
- Place a square sheet on the table.
- Follow a simple ghost origami diagram designed for beginners.
- Fold the corners and edges as shown in the chosen pattern.
- Draw two eyes and a mouth with a marker.
Example: In a small 8 × 10-foot (2.4 × 3 m) playroom, a family can make five ghosts using leftover white paper. The simple style suits renters because the finished ghosts can hang with removable tape.
2. Fold a Halloween Pumpkin
A paper pumpkin brings bright color to a craft table or classroom display. Use orange paper and a green scrap for the stem. Some pumpkin models use only folds, while others need a small paper detail added at the end.
How to make it:
- Choose orange square paper.
- Follow a beginner pumpkin-folding pattern.
- Press each crease firmly with your fingers.
- Add a green paper stem and draw a friendly face if you like.
Example: In a medium 12 × 14-foot (3.7 × 4.3 m) family room, kids can arrange three pumpkins on a shelf. This low-cost idea suits families who want seasonal color without buying new decorations.
3. Create a Spooky Paper Bat
Paper bats add a classic Halloween look to walls, windows, and craft displays. Black or purple paper creates a bold shape, while white paper works for a friendly bat. Choose a basic model before trying designs with many small folds.
How to make it:
- Start with a square sheet of paper.
- Follow the folds in a beginner bat diagram.
- Shape the wings carefully and press the creases.
- Add small eyes with a marker.
Example: In a small 9 × 10-foot (2.7 × 3 m) bedroom, two or three paper bats can decorate a study corner. Renters can use removable tape, while parents should keep decorations away from fans and lights.
More Halloween Paper Crafts for Older Kids
Once children understand basic folds, introduce models with more corners and smaller details. These projects suit older kids who enjoy a little challenge. Keep the instructions visible, and let children repeat a fold if the paper does not line up the first time.
- Try a black cat with pointed ears.
- Make a paper spider for a pretend web.
- Fold a small witch hat for a toy or display.
- Combine finished models into a themed paper scene.
4. Fold a Black Cat
A black paper cat can look spooky or cute with pointed ears, bright eyes, and drawn whiskers. This project helps children practice matching corners and making neat creases. Choose a beginner cat pattern with clear diagrams for the best experience.
How to make it:
- Pick black square paper.
- Fold the paper according to a cat-head pattern.
- Shape the ears and lower face.
- Add eyes, a nose, and whiskers with a marker.
Example: In a medium 11 × 13-foot (3.4 × 4 m) living room, a child can place a paper cat beside a few pumpkins on a small table. This playful style suits families and works with simple black-and-orange decor.
5. Make a Paper Spider
A folded spider adds a funny creepy-crawly detail to a Halloween display. Choose a model that uses clear folds and paper legs. Some designs require cuts, so an adult should handle scissors for younger children.
How to make it:
- Select black or purple paper.
- Follow a simple spider origami pattern.
- Fold the body and shape the legs as directed.
- Add small eyes with a white or silver marker.
Example: In a small 8 × 9-foot (2.4 × 2.7 m) craft area, kids can place two paper spiders beside a handmade web. The design suits older children who like playful spooky details on a limited budget.
6. Create a Tiny Witch Hat
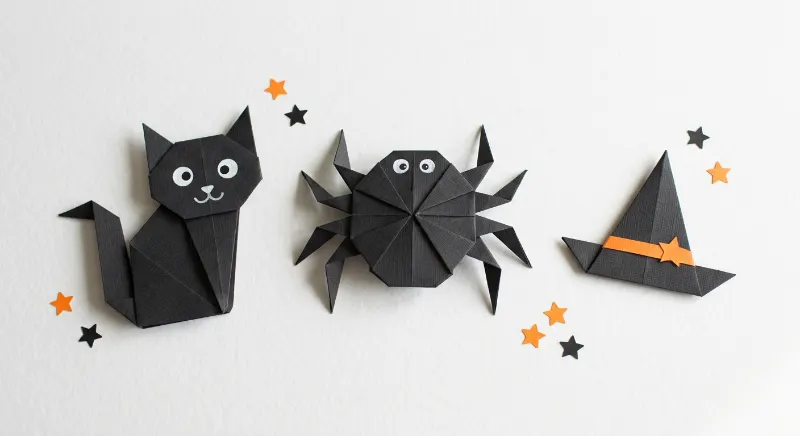
A paper witch hat adds a magical touch to Halloween crafts. Use black, purple, or dark green paper, then add a small orange band. Choose a pattern with clear steps because the pointed top can take practice.
How to make it:
- Start with a square piece of paper.
- Follow a simple pointed-hat folding pattern.
- Shape the brim and top carefully.
- Decorate with a paper buckle or a small drawn star.
Example: In a large 14 × 16-foot (4.3 × 4.9 m) family room, children can arrange tiny hats around a craft centerpiece. This playful style suits families hosting a Halloween activity afternoon.
Turn Your Origami Into a Halloween Garland
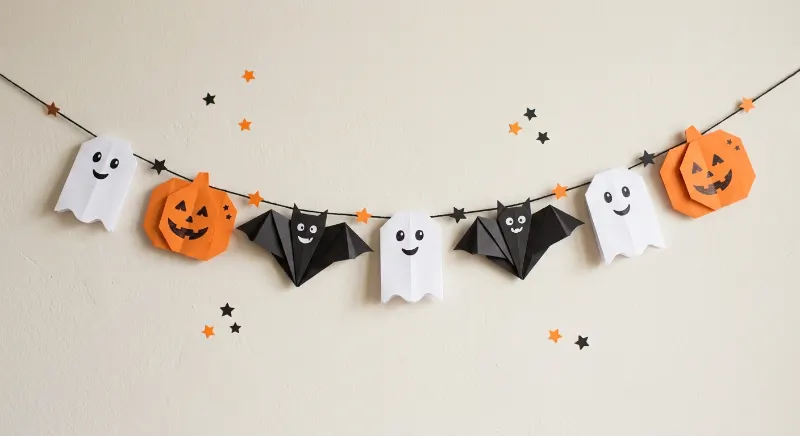
A paper garland turns individual crafts into one connected decoration. Children can fold several ghosts, bats, or pumpkins and arrange them in a repeating pattern. This project works well for bedrooms, classroom walls, and family craft parties.
- Make four to eight paper shapes in different colors.
- Lay them out before deciding the order.
- Attach them to string with clips or adult-applied tape.
- Leave enough space between shapes so each design stays visible.
Plan a Balanced Garland
Choose one main shape and add smaller shapes around it. For example, alternate three black bats with three white ghosts for a simple look. A repeating pattern makes the garland look tidy without requiring matching folds.
Example: In a medium 12 × 14-foot (3.7 × 4.3 m) living room, a garland measuring about 48 inches (122 cm) can fit above a craft table. This simple style suits renters when they use removable hanging strips rated for the surface and weight.
Add a Paper Craft Station
A craft station helps children make several designs without covering the whole room. Place paper, markers, and finished models in separate trays. Kids who enjoy making seasonal keepsakes can also try salt dough Christmas ornaments during another family craft session.
Make the Craft Session Easier for Kids
A little planning helps children enjoy folding without getting frustrated. Choose a clear table, keep the first model simple, and show one step at a time. The goal is to enjoy the activity, not to make every paper shape perfect.
- Prepare square paper before children sit down.
- Use diagrams with clear arrows and visible folds.
- Offer help when a fold becomes confusing.
- Take short breaks when children feel tired.
Match Each Project to the Child’s Age
Younger children often enjoy decorating shapes more than following detailed folding steps. Older kids may like working from diagrams on their own. Choose the project based on each child’s comfort, patience, and hand control rather than age alone.
Keep Materials Safe
Use child-safe supplies and supervise children who use scissors. Avoid tiny decorations around toddlers because they can pose a choking risk. Keep paper away from candles, heaters, and cooking areas, and never attach garlands where they could touch a light bulb.
Example: In a small 8 × 10-foot (2.4 × 3 m) dining area, a family can use one tray for paper and another for markers. This tidy setup suits families with pets because it helps keep loose paper and small craft pieces off the floor.
Display Your Finished Halloween Origami

Finished paper crafts deserve a place where children can see their work. A shelf, craft board, or bedroom wall can hold small designs without needing a full room makeover. Choose a display spot that matches the room’s size and keeps decorations away from daily activities.
- Place small figures on a stable shelf.
- Hang lightweight shapes with suitable removable tape.
- Group similar colors for a neat display.
- Keep paper away from water, heat, and open flames.
Create a Mini Halloween Scene
Arrange a paper ghost, pumpkin, bat, and cat together to make a small Halloween scene. Use a plain tray or a piece of cardboard as the base. Children can add paper grass, drawn stars, or a simple background.
Example: In a medium 12 × 15-foot (3.7 × 4.6 m) family room, a 12-inch (30.5 cm) tray can hold a few small origami figures. This budget-friendly display suits families who prefer reusable decorations over bulky seasonal items.
Decorate a Bedroom or Reading Corner
A few paper bats or ghosts can bring a Halloween touch to a child’s reading corner. Keep the display light and use colors that work with the existing room. For a softer look, combine orange and warm white rather than using only black.
If you already use seasonal decor, choose a small display that fits your usual style. Simple pieces can sit beside neutral accessories, much like the lasting accents used in Christmas decor that still looks good after Christmas.
Budget-Friendly Ways to Improve Your Paper Crafts
You do not need expensive tools to make attractive Halloween origami. Use supplies you already own, save leftover paper, and add detail with simple drawing tools. Spend more only when a project needs a material you do not have.
| Budget level | What to use | Best for |
| Low | Reused paper, pencils, and crayons | First projects and classroom practice |
| Medium | Colored origami paper, markers, and glue sticks | Families making several designs |
| High | A larger range of paper colors and extra craft tools | Group activities and bigger displays |
Reuse Paper Without Making the Crafts Look Messy
Clean paper from old craft packs, unused notebooks, or leftover wrapping paper can work for simple models. Check that the paper is not too thick or slippery for the chosen folds. Avoid paper with sharp staples, dirt, or torn edges.
Example: In a small 9 × 10-foot (2.7 × 3 m) bedroom, a child can make three paper bats from leftover black paper and display them above a desk. This low-budget idea suits renters who want seasonal decor without permanent changes.
Add More Detail With Simple Supplies
Markers can create faces, spots, stripes, and tiny stars. Small paper scraps can become pumpkin stems or cat noses. If your family enjoys making things at home, a separate activity such as homemade wax melts can suit an adult craft session, but keep hot wax and heating tools away from children.
Common Origami Problems and Simple Fixes
Paper folding may feel tricky at first, especially when corners do not line up. Encourage children to unfold the paper and try again instead of starting over each time. A few small changes can make the activity easier.
- Uneven corners: Line up the edges before pressing the crease.
- Paper that springs open: Press the fold firmly with a fingertip.
- Confusing steps: Return to the last fold that looked correct.
- Torn paper: Use a fresh sheet and fold more gently.
Help Without Taking Over
Show the fold slowly, then let the child try it. Ask them to compare their paper with the diagram before moving to the next step. This method helps children learn while keeping the activity fun.
Example: In a medium 10 × 12-foot (3 × 3.7 m) playroom, a parent can sit beside a child making a bat from purple paper. This simple setup suits families who want a calm indoor activity with little cleanup.
Add Origami to a Halloween Party
Origami can become part of a Halloween party instead of just a decoration project. Set out paper and markers before guests arrive, then let each child choose a model. Keep the designs simple so everyone has time to finish one.
- Prepare a few sample models for children to copy.
- Offer orange, black, white, and purple paper.
- Use finished crafts as table decorations.
- Let each child take their creation home.
Make a Simple Craft Challenge
Give children a short list of shapes to try, such as a ghost, a pumpkin, or a bat. They can choose their favorite design and add a name tag. Avoid turning the activity into a race; children fold at different speeds.
Example: In a large 14 × 18-foot (4.3 × 5.5 m) party room, set up one table for paper folding and another for decorating. This flexible layout suits families hosting a group of children and helps keep supplies organized.
Combine Paper Crafts With Other Seasonal Decor
Paper shapes work well beside fabric pumpkins, soft cushions, and other lightweight seasonal accents. Keep the display simple so the children’s work remains the focus. If you plan a nature-inspired room theme, bedroom plants that suit indoor spaces can inspire a separate everyday decor update.
Use Paper Crafts in Your Halloween Home Decor
Origami can add a handmade touch to different rooms without taking up much space. Choose a few pieces for a small apartment, or create a larger display in a family home. Keep the style consistent by repeating two or three colors.
- Use a few bats for a simple wall display.
- Place paper pumpkins on a dry shelf.
- Hang a lightweight garland away from walkways.
- Store clean, dry crafts in a box for next year.
Make an Indoor Display Inspired by Your Porch
You can bring the Halloween look indoors with folded ghosts, bats, and pumpkins arranged near an entry table. For outdoor inspiration, Halloween front porch ideas can help you plan a matching theme. Keep paper origami indoors because rain and damp air can damage it.
Example: In a small 8 × 10-foot (2.4 × 3 m) entry area, arrange two paper ghosts and one pumpkin on a stable console. This low-cost display suits renters and families who want a seasonal welcome without permanent changes.
FAQ
What is the easiest Halloween origami for kids?
A simple ghost, pumpkin, or bat is a good starting point. Choose a beginner pattern with clear folding steps. Younger children can decorate a pre-folded shape, while older kids can follow the full instructions.
What paper works best for Halloween origami?
Lightweight square origami paper works well for most beginner models. A 6 × 6-inch (15.2 × 15.2 cm) sheet suits many small designs. Use larger squares when children need more room to see and handle each fold.
Can preschoolers make Halloween origami?
Yes, with adult help and age-appropriate designs. Preschoolers may enjoy folding simple shapes with support or decorating shapes that an adult has already folded. Avoid small loose pieces around children who still put objects in their mouths.
How can kids display their Halloween origami?
Children can arrange their finished pieces on a shelf, attach lightweight shapes to a craft board, or make a simple paper garland. Use suitable removable hanging materials in rental homes, and keep decorations away from heat, lights, and walkways.
How do you make Halloween origami last longer?
Store dry paper crafts in a clean box after Halloween. Keep them away from moisture, direct sunlight, and heavy objects. Handle folded corners gently, as paper can crease or tear with repeated use.
Final Thoughts
Halloween origami ideas for kids offer a simple way to make spooky decorations without buying lots of supplies. Start with a ghost, pumpkin, or bat, then try cats, spiders, and garlands as children gain confidence.
Use clear instructions, safe materials, and colors your kids enjoy. Display their finished crafts in a place where everyone can see them.
Which Halloween origami project will your kids make first? Let them choose a favorite shape and enjoy creating something together.





- Be Respectful
- Stay Relevant
- Stay Positive
- True Feedback
- Encourage Discussion
- Avoid Spamming
- No Fake News
- Don't Copy-Paste
- No Personal Attacks
- Be Respectful
- Stay Relevant
- Stay Positive
- True Feedback
- Encourage Discussion
- Avoid Spamming
- No Fake News
- Don't Copy-Paste
- No Personal Attacks
