4 Mini Ghost Crochet Patterns for Cute Halloween Decor
Published: 15 Oct 2026
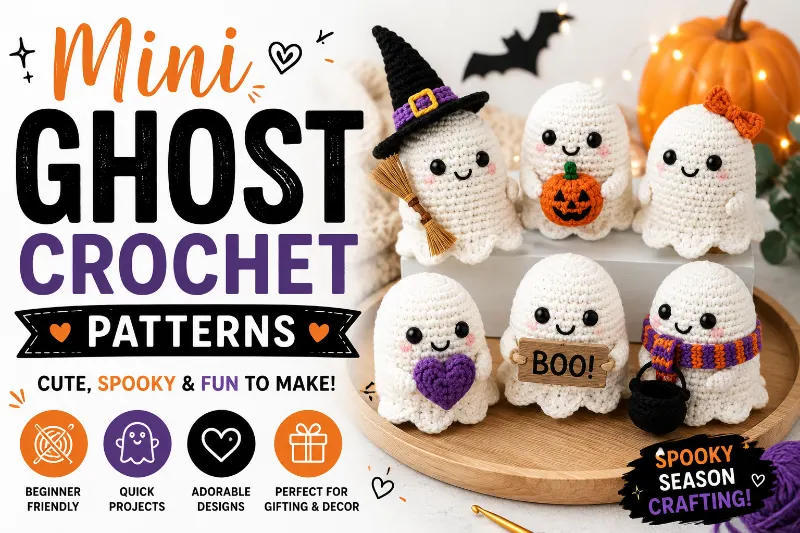
Mini ghost crochet patterns are a fun way to make cute Halloween decorations without using much yarn. These tiny ghosts can decorate your desk, shelves, gift bags, or Halloween party table. Want to make a little ghost of your own? This guide shares four beginner-friendly designs with simple instructions, helpful tips, and creative ideas.
How Do You Crochet a Mini Ghost?
To crochet a mini ghost, start with a magic ring, work single crochet stitches in the round, increase to shape the head, and then decrease to close the body. Add a wavy bottom, embroidered eyes, or a tiny hat to give your ghost its own style.
Skill level: Beginner to easy intermediate
Time: Allow around 30–90 minutes per small ghost as a planning estimate. Your speed and experience will affect the time.
Best yarn: White or cream cotton yarn, or a soft acrylic yarn
Other supplies: Crochet hook that suits your yarn, stitch marker, yarn needle, scissors, and optional stuffing
Before You Start: Gather Your Crochet Supplies
You do not need a large craft budget to make mini ghost crochet patterns. A small amount of leftover yarn, a suitable hook, and a few basic tools can help you create several Halloween decorations. Choose smooth yarn so you can see each stitch clearly.
- Yarn: White, ivory, or pale gray yarn for the ghost body.
- Hook: Use the size recommended on your yarn label. A slightly smaller hook can help make tighter stitches.
- Stuffing: Use a small amount of fiberfill for a soft, rounded ghost.
- Face details: Choose black embroidery thread for the eyes and mouth.
- Basic tools: Keep scissors, a yarn needle, and a stitch marker nearby.
Crochet terms made simple: A magic ring is an adjustable loop that lets you close the center of a crochet circle. A single crochet is a short stitch that creates a firm fabric. An increase adds stitches, while a decrease joins stitches to narrow the shape.
Example: For a small 3-inch (7.6 cm) ghost, a beginner might use leftover white yarn, a matching hook, and a little stuffing. This works well for a simple, cute Halloween style on a small craft budget.
Helpful Tips for Your First Ghost
- Count your stitches at the end of each round.
- Use a stitch marker to track the first stitch.
- Keep your tension even, but do not pull the yarn too tightly.
- Practise the magic ring before starting if it feels difficult.
Safety note: Keep scissors and needles away from young children. If you make ghosts for children under three, avoid loose plastic eyes, buttons, and other small parts that may become choking hazards. Embroidered facial features are a safer choice.
Pattern 1: Make a Soft, Round Baby Ghost
This round ghost has a large head, a short body, and a simple face. It suits beginners who want a quick project for Halloween gifts or shelf decor. White yarn keeps the design classic, while cream yarn gives it a warm, handmade look.
Design details: Rounded body, tiny embroidered eyes, smooth bottom
Suggested finished height: About 2.5–3.5 inches (6.4–8.9 cm), depending on yarn and tension
Materials
- White yarn
- Matching crochet hook
- Small amount of fiberfill
- Black embroidery thread
- Yarn needle and stitch marker
Crochet Instructions
Work in continuous rounds unless stated otherwise. Place a stitch marker in the first stitch of every round.
- Round 1: Make a magic ring and work 6 single crochet stitches into it. Pull the ring closed.
- Round 2: Work 2 single crochet stitches in each stitch. You will have 12 stitches.
- Round 3: Repeat 1 single crochet, then 1 increase around. You will have 18 stitches.
- Round 4: Single crochet in every stitch for 18 stitches.
- Rounds 5–7: Repeat the previous round to build the head and body.
- Round 8: Repeat 1 single crochet, then 1 decrease around. You will have 12 stitches.
- Add a little stuffing. Keep it soft so the ghost stays rounded.
- Round 9: Decrease around until the opening is small. Fasten off and close the gap with a yarn needle.
Add the Face
Sew two small black eyes onto the front of the ghost. Place them a little below the center of the head. Add a tiny curved mouth if you want a happy expression.
- Use black thread for a classic Halloween face.
- Try gray thread for a softer look.
- Add a small blush detail with pink yarn if desired.
Example: In a small 8 × 10-foot (2.4 × 3-meter) bedroom, place one 3-inch ghost on a bedside shelf with a white frame and a warm orange accent. It suits renters because it adds seasonal style without wall changes.
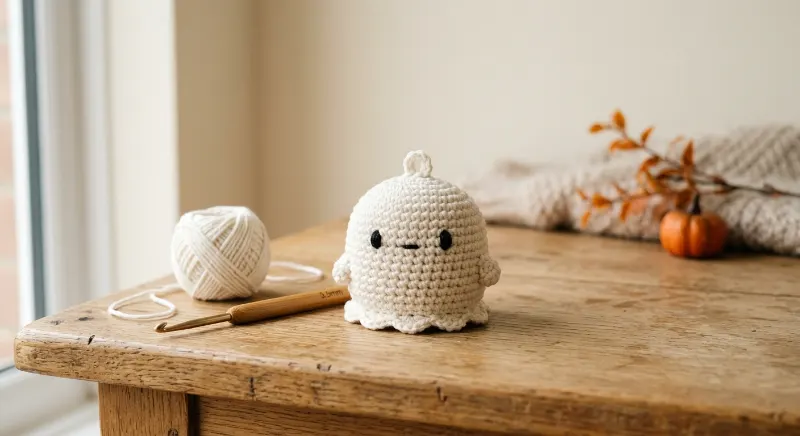
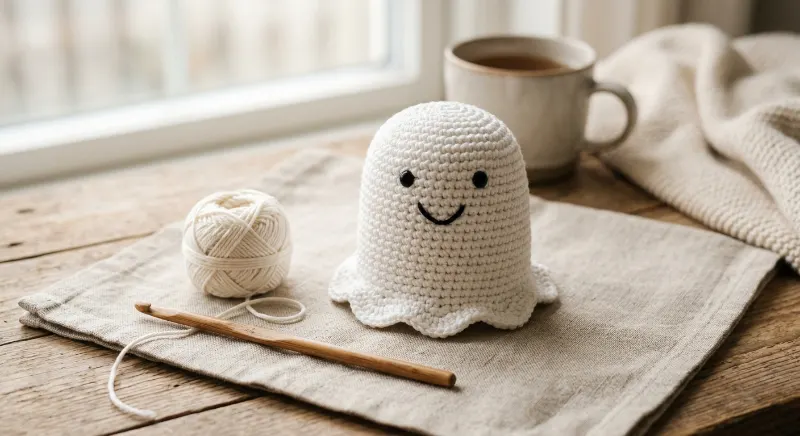
Pattern 2: Crochet a Wavy Ghost with a Smile
A wavy ghost has a flowing lower edge that makes it look as if it is floating. This design adds movement without requiring complicated stitches. Use a simple white body and a smiling face to make a friendly decoration for shelves, craft baskets, or Halloween gift boxes.
Design details: Rounded top, flared lower edge, smiling face
Suggested finished height: About 3–4 inches (7.6–10.2 cm)
Crochet Instructions
Start with the same first three rounds as the baby ghost. These rounds create a small circle that forms the top of the body.
- Work 6 single crochet stitches into a magic ring.
- Increase to 12 stitches in Round 2.
- Increase to 18 stitches in Round 3.
- Work 18 single crochet stitches for the next two rounds.
- Increase evenly to 24 stitches in the following round.
- Work 24 single crochet stitches for two more rounds.
- For a simple wavy edge, repeat slip stitch in the next stitch, half double crochet in the next stitch, 2 double crochet stitches in the next stitch, half double crochet in the next stitch around. Adjust the sequence if your stitch count does not divide evenly.
- Fasten off and weave in the yarn ends.
A half double crochet is taller than a single crochet but shorter than a double crochet. Mixing stitch heights creates a gentle wave. If the edge curls too much, use fewer tall stitches.
Give Your Ghost a Happy Face
Use black embroidery thread to make two eyes and a small curved smile. Keep the face near the upper part of the body so the ghost looks balanced.
- Make the eyes small and round for a cute style.
- Use a short stitched line for a simple smile.
- Add a tiny pink bow with yarn if you want a playful finish.
Example: In a medium 12 × 14-foot (3.7 × 4.3-meter) living room, display a 4-inch ghost on a tray with a small pumpkin and cream candles. It suits families who want cheerful Halloween decor without a scary look.
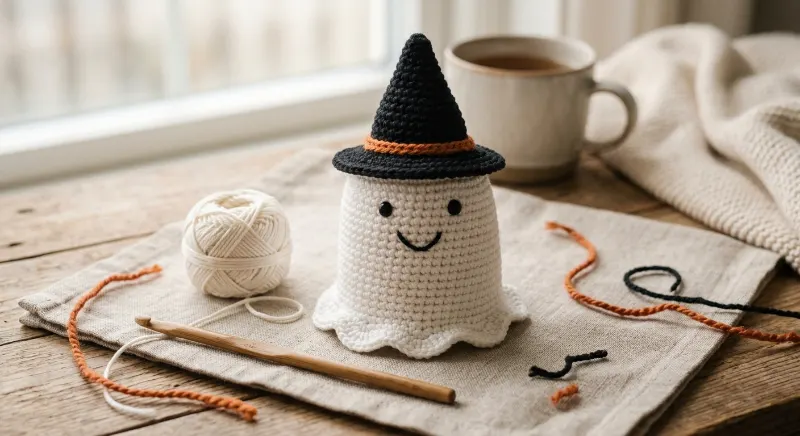
Pattern 3: Make a Tiny Ghost with a Witch Hat
A tiny witch hat gives a simple crochet ghost a playful Halloween look. Choose black yarn for the hat and orange yarn for a narrow band. This design works well as a small handmade gift, a seasonal shelf decoration, or a festive addition to a craft display.
Design details: White ghost, pointed black hat, optional orange band
Suggested finished height: About 3–4.5 inches (7.6–11.4 cm), depending on the hat siCrochet the Ghost Body
Make the round baby ghost using the instructions in Pattern 1. Leave the body soft and rounded. Embroider the eyes before attaching the hat so you can position the face easily.
Crochet a Simple Witch Hat
Use black yarn and a suitable hook. Work in continuous rounds for the pointed top.
- Make a magic ring and work 4 single crochet stitches into it.
- Work 4 single crochet stitches in the next round.
- Increase evenly to 6 stitches.
- Work one round of 6 single crochet stitches.
- Increase evenly to 8 stitches.
- Continue increasing gradually, with a plain round between increase rounds, until the cone is as tall as you want.
- For the brim, work increases around the bottom edge to make it flare outward. You may need to attach the yarn to the cone’s base to begin this step.
- Fasten off and weave in the ends.
The hat is a small cone with a flat brim. If you are new to crochet, make the cone first and add a separate flat crocheted circle as the brim. Sew the two parts together.
Finish the Halloween Look
Place the hat slightly to one side of the ghost’s head. Sew it in place with black yarn, taking small stitches through the hat and the ghost body.
- Add a thin orange band around the hat.
- Use a tiny yellow stitch for a buckle.
- Keep decorations light so the small hat does not pull the ghost sideways.
Example: In a small 10 × 10-foot (3 × 3-meter) rental room, place a 4-inch ghost beside a black picture frame and an orange fabric pumpkin. This suits renters because the decoration sits on furniture and needs no wall hooks.
For more handmade seasonal inspiration, see our guide to making salt dough Christmas ornaments at home. You can use the same idea of creating small, personal decorations for different holidays.
Pattern 4: Create a Tall Cone-Shaped Ghost
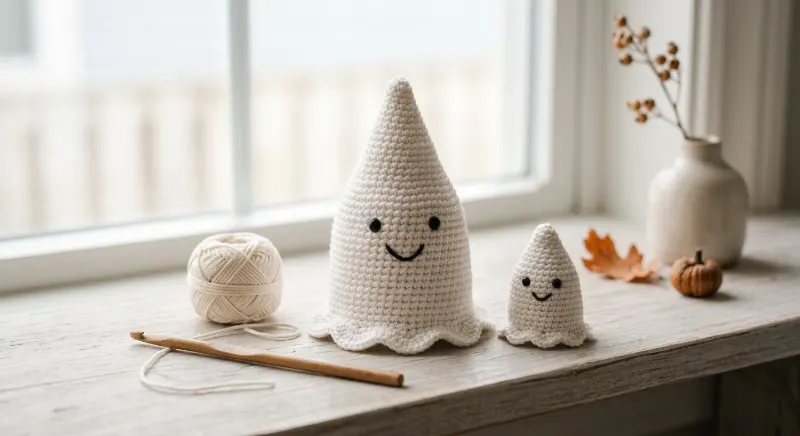
A cone-shaped ghost has a narrow top and a wider base. It looks a little like a floating sheet and needs less stuffing than a round ghost. This design suits people who want a simple Halloween figure with a clean shape and a soft, handmade finish.
Design details: Pointed or narrow top, flared body, flat or wavy base
Suggested finished height: About 3–5 inches (7.6–12.7 cm)
Crochet Instructions
Begin at the top and increase gradually as you work down the body. This creates a taller shape that becomes wider toward the bottom.
- Make a magic ring and work 4 single crochet stitches into it.
- Work one round of 4 single crochet stitches.
- Increase evenly to 6 stitches.
- Work one plain round.
- Increase evenly to 9 stitches.
- Work two plain rounds.
- Increase evenly to 12 stitches.
- Continue with plain rounds until the body reaches your preferred height.
- Add a few increases near the base if you want a wider shape.
- Finish with a simple single crochet edge or use the wavy edge instructions from Pattern 2.
These stitch counts create a starting shape, not a fixed-size pattern. Yarn thickness, hook size, and tension can change the result. Add or remove plain rounds to adjust the height.
Add Simple Details
Stuff the upper section lightly if you want the ghost to hold its shape. Some cone ghosts look good without stuffing, especially when you use firm stitches and a heavier yarn.
- Embroider two small eyes near the top.
- Add a tiny mouth for a friendly expression.
- Use cream yarn for a soft vintage look.
- Make a second ghost in pale gray for a matching pair.
Example: In a large 16 × 18-foot (4.9 × 5.5-meter) family room, place two cone ghosts on a mantel or wide shelf beside white pumpkins. This suits families who want a calm Halloween display that does not fill the whole room with bright colors.
If you enjoy keeping seasonal decor simple, our guide to Christmas decor that still looks good after Christmas shares ideas for choosing decorations that work beyond one holiday.
How Can You Make Your Mini Ghosts Look Different?
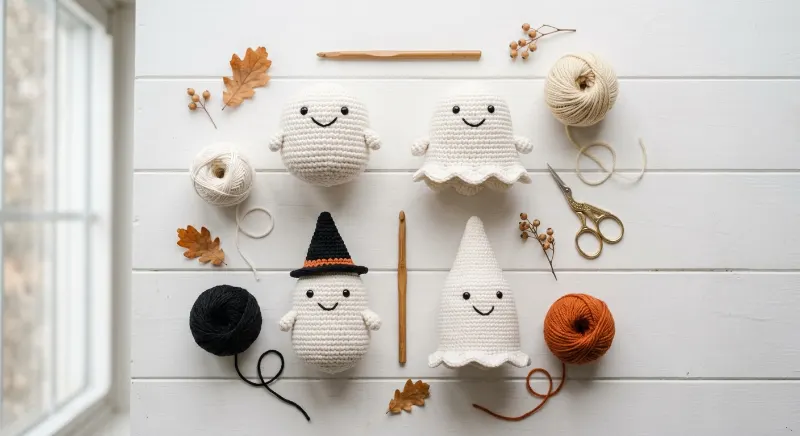
Small changes can give each ghost a different personality. You can use the same basic body and change the face, yarn color, hat, or bottom edge. This approach saves time and helps beginners build confidence without learning a new pattern for every decoration.
- Cute style: Add a small smile and pink cheeks.
- Classic Halloween style: Use white yarn and black eyes.
- Witchy style: Add a black hat with an orange band.
- Soft farmhouse style: Choose ivory yarn and natural wood accents.
Example: In a medium 12 × 12-foot (3.7 × 3.7-meter) craft room, arrange three ghosts on a white shelf with a small orange pumpkin. This suits renters, crafters, and pet owners who want lightweight decorations placed safely out of reach.
How Do You Display Mini Crochet Ghosts at Home?
Mini ghosts work well in small spaces because they take up little room and are easy to move. Place them on a tray, bookshelf, desk, or covered entry table. Keep them away from open flames, hot bulbs, and damp areas to protect the yarn.
- Small rooms: Display one ghost on a bedside table or desk.
- Medium rooms: Group two or three ghosts on a shelf.
- Large rooms: Use a small group as part of a wider Halloween display.
- Homes with pets: Place crochet decorations where pets cannot chew or swallow them.
Example: In a small 8 × 10-foot (2.4 × 3-meter) entry area, place two mini ghosts on a stable console table with a fabric pumpkin. This suits renters who want a seasonal display without drilling holes or changing their walls.
For another seasonal craft idea, explore how to make wax melts at home step by step. Keep any scented wax and warmers away from yarn decorations, children, and pets.

Budget Tips for Making Mini Ghost Crochet Patterns
You can keep this craft affordable by using supplies you already own. The main cost depends on the yarn and tools you need to buy, so check current prices before planning a budget. You do not need special accessories to make a cute ghost.
| Budget level | Practical option |
| Low | Use leftover yarn, an existing hook, and embroidered faces. |
| Medium | Choose a small matching set of yarn colors for several ghost designs. |
| High | Buy a wider range of yarn colors and extra tools for a larger craft project. |
These are supply-planning options, not fixed price estimates. Use the hook size that works with your chosen yarn, and avoid buying extra materials until you know which designs you want to make.
Example: A beginner in a medium 10 × 12-foot (3 × 3.7-meter) hobby room could start with one white yarn leftover and black embroidery thread. The simple style suits budget-conscious crafters who want to try one pattern before making a full set.
For a different way to bring nature into your home between seasonal displays, see our guide to the best bedroom plants for better sleep and air quality. Keep plants and craft items arranged to suit your space and care needs.
Frequently Asked Questions
Are mini ghost crochet patterns good for beginners?
Yes. A round ghost uses basic stitches and simple shaping. Beginners can start with the baby ghost and practise increases and decreases before trying the wavy edge or witch hat.
What yarn works best for mini crochet ghosts?
Smooth cotton or acrylic yarn works well for small amigurumi projects. Amigurumi means small crocheted or knitted stuffed figures. Choose a yarn you can see clearly while you count stitches.
How long does it take to crochet a mini ghost?
A small design may take around 30–90 minutes as a rough planning estimate. Your experience, yarn thickness, pattern details, and crochet speed can change the time.
Can I make mini ghosts without stuffing?
Yes. A cone-shaped ghost can work without stuffing if you use firm stitches and want a flatter, sheet-like look. A round ghost usually looks fuller with a little fiberfill.
How can I make crochet ghosts safe for young children?
Use embroidered eyes instead of plastic eyes or buttons, secure yarn ends, and avoid loose decorations. Keep needles, scissors, and small parts away from children. Follow age-appropriate toy safety guidance if you plan to sell or gift the ghosts as toys.
Final Thoughts
Mini ghost crochet patterns offer a simple way to add handmade charm to Halloween. Start with the round baby ghost, then try a wavy edge, a witch hat, or a tall cone shape. Use leftover yarn and choose a style that fits your home.
Keep your first design simple, count your stitches, and adjust the shape as you learn. You can make one ghost for your desk or create a small set for a shelf or entry table.
Which mini ghost will you make first: the round baby ghost, the smiling wavy ghost, the witch-hat ghost, or the cone-shaped ghost?
For one more Halloween decorating idea, explore these scary Halloween front porch ideas and pair your crochet ghosts with a seasonal outdoor theme. Keep yarn decorations indoors or in a dry, sheltered spot.




- Be Respectful
- Stay Relevant
- Stay Positive
- True Feedback
- Encourage Discussion
- Avoid Spamming
- No Fake News
- Don't Copy-Paste
- No Personal Attacks
- Be Respectful
- Stay Relevant
- Stay Positive
- True Feedback
- Encourage Discussion
- Avoid Spamming
- No Fake News
- Don't Copy-Paste
- No Personal Attacks
