DIY Halloween Paper Garland: 21 Easy Ideas for a Spooky Home
Published: 14 Oct 2026
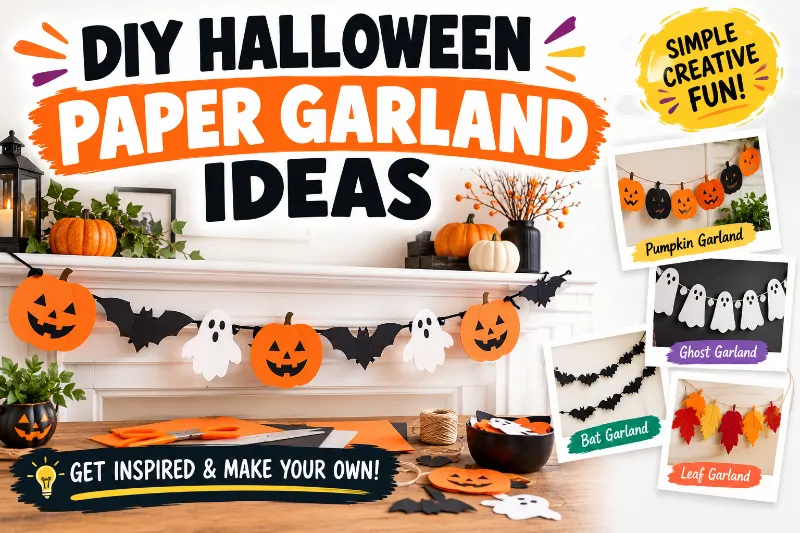
Halloween decorations do not need to cost a lot. Paper, scissors, string, and a little creativity can turn a plain wall into a fun Halloween display. These DIY Halloween paper garland ideas suit small apartments, family homes, and cozy party spaces.
Want to decorate your home without spending much money? This guide shares 21 paper garland ideas, simple making steps, budget tips, and easy ways to hang your decorations without damaging your walls.
The easiest DIY Halloween paper garland uses folded paper shapes, cut-out pumpkins, ghosts, bats, or triangle flags attached to string. Choose black, orange, white, and purple paper to create a spooky look with basic craft supplies.
What Do You Need to Make DIY Halloween Paper Garlands?
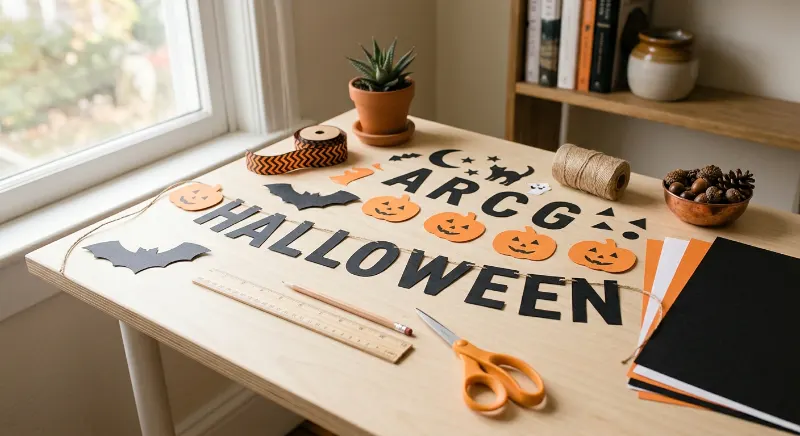
Most paper garlands use simple supplies that you may already have at home. Choose sturdy paper for decorations you want to reuse. Thin paper works well for lightweight indoor displays, while cardstock holds its shape better for larger designs.
Example: For a small 6-foot (183 cm) mantel in a rental apartment, you can make a simple black-and-orange garland with paper scraps, cotton string, and removable hooks.
- Paper: Use orange, black, white, purple, or green construction paper.
- Tools: Keep scissors, a pencil, a ruler, and a glue stick nearby.
- Hanging supplies: Choose cotton string, yarn, or ribbon.
- Optional tools: Use a hole punch, craft knife, or cutting machine for detailed shapes.
Safety tip: Adults should handle craft knives and cutting machines. Keep scissors and small craft pieces away from young children and pets.
21 DIY Halloween Paper Garland Ideas for Every Home
These Halloween paper garlands range from cute pumpkin chains to creepy haunted-house silhouettes. Each idea offers a different look, so you can match your decorations to your room, budget, and crafting skills. Start with a simple design if this is your first paper craft project.
Example: A family with a medium-sized living room can combine orange pumpkins and white ghosts for a playful display. A renter with a small room can choose one narrow bat garland above a doorway to save space.
1. Classic Pumpkin Paper Chain
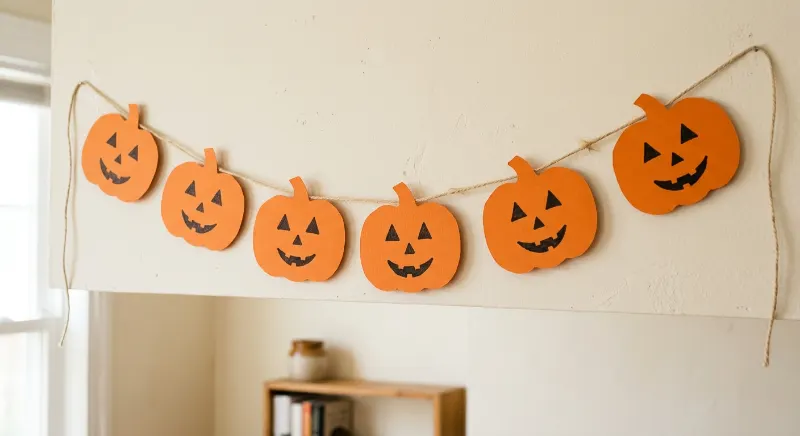
A pumpkin paper chain brings a bright autumn look to your Halloween decorations. Cut matching pumpkin shapes from orange paper, draw simple faces with a black marker, and connect the pieces with string or paper loops. This beginner-friendly craft works well for families and small spaces.
Example: For a small 4-foot (122 cm) shelf, make a short chain of orange pumpkins with black faces.
- Draw one pumpkin shape on scrap paper to use as a template.
- Cut matching shapes from orange cardstock.
- Add smiling, surprised, or spooky faces.
- Attach the pumpkins to string with glue or small paper tabs.
Budget tip: Reuse orange paper from old craft projects instead of buying new supplies.
2. Accordion Ghost Garland
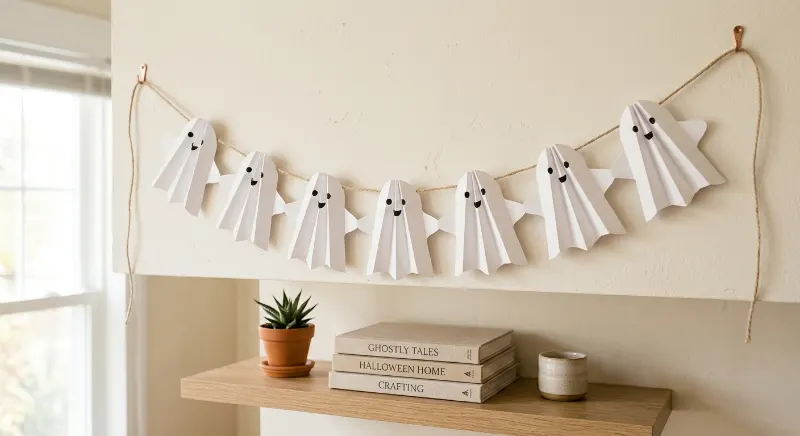
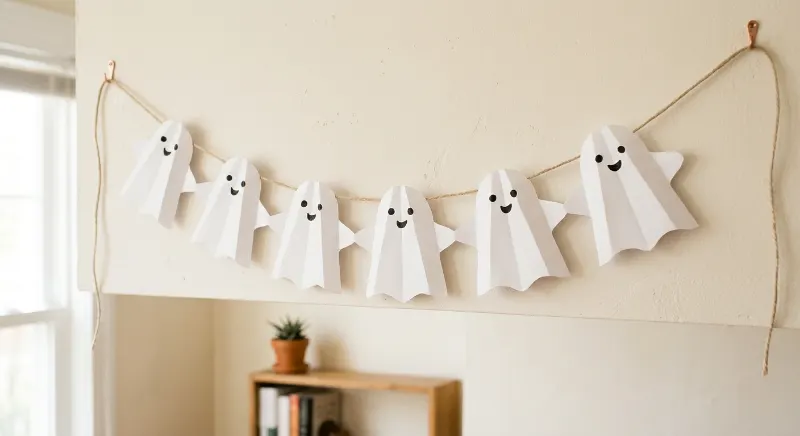
Accordion-folded ghosts add movement and texture to a Halloween display. Fold white paper back and forth, cut a ghost shape while keeping the folded edges connected, and open the chain. Add black eyes for a simple design that feels cute rather than frightening.
Example: Hang a 5-foot (152 cm) ghost chain above a medium-sized child’s desk for a playful Halloween look.
- Use white paper for a classic ghost effect.
- Make even accordion folds with a ruler.
- Leave small paper bridges at the sides so the ghosts stay connected.
- Draw the eyes after opening the chain.
Renter-friendly tip: Hang the lightweight garland from removable hooks or existing shelf brackets.
3. Black Bat Bunting
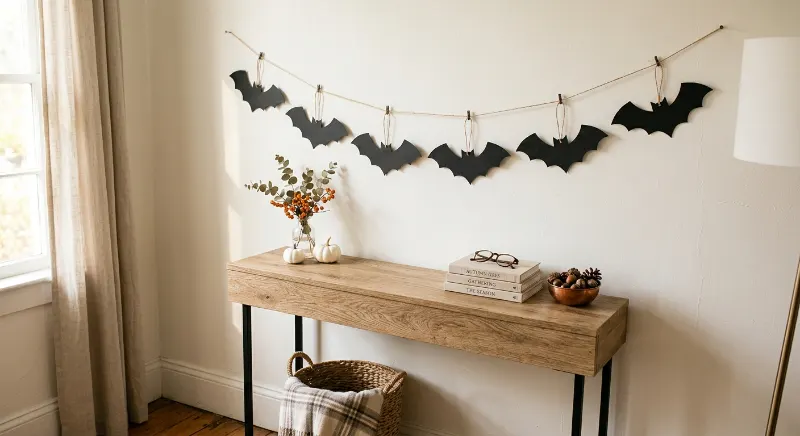
Black bat bunting creates a spooky look without filling a room with too many decorations. Cut bats from black cardstock and attach them to black string or thin ribbon. The simple shapes look especially striking against warm white walls, pale wood, or orange accents.
Example: A renter with a small bedroom can hang a 4-foot (122 cm) bat garland above a dresser for a clean, modern Halloween style.
- Draw a bat template with wide wings.
- Trace and cut several matching bats.
- Punch two small holes in each bat or attach the string with paper tabs.
- Space the bats evenly along the line.
Budget tip: Use leftover black cardstock for a low-cost decoration.
4. Classic Triangle Halloween Banner
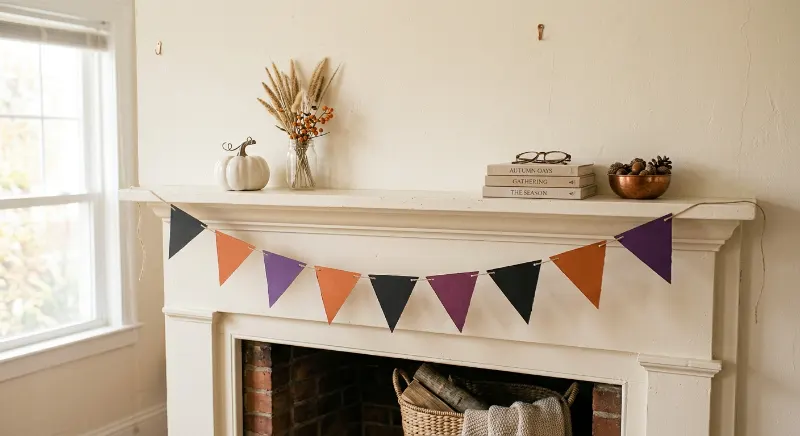
A triangle banner is a simple way to add Halloween colors to a mantel, window, or party table. Cut matching flags from colored paper, then write short words or add small pictures. Orange, black, and purple create a classic seasonal palette without the need for extra ornaments.
Example: For a medium 6-foot (183 cm) mantel, make a banner with alternating orange and black flags.
- Cut equal triangles using a paper template.
- Write “BOO” or draw small pumpkins on selected flags.
- Fold the top edge over string and glue it in place.
- Leave a little space between each flag.
Style tip: Use white lettering on black flags for a clear, bold look.
5. Printable Halloween Cut-Out Garland
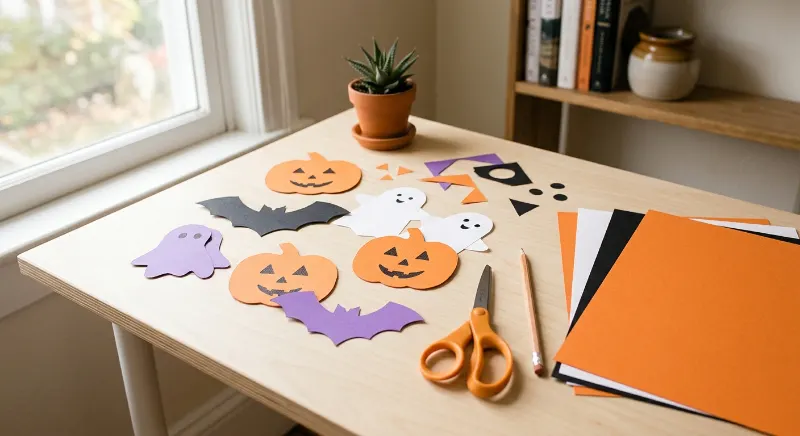
Printable cut-outs help you create neat decorations without drawing every shape by hand. Print original or properly licensed templates, cut out the designs, and attach them to string. This option suits busy beginners who want a coordinated look for a party or family gathering.
Example: A family decorating a medium-sized dining room can print a matching set of pumpkins and ghosts for a 5-foot (152 cm) table backdrop.
- Choose a template with clear outlines.
- Print on cardstock if the printer supports it.
- Cut each shape carefully around the edges.
- Add string using tape or small punched holes.
Important: Check the template’s usage rights before printing or sharing it.
6. Folded Spiderweb Garland
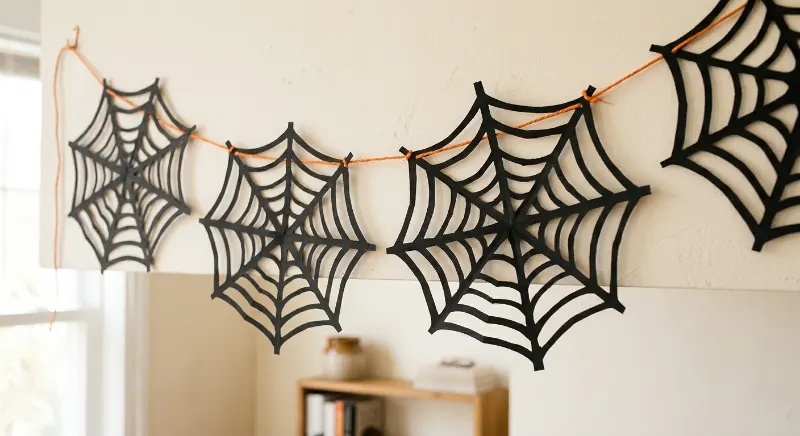
A folded spiderweb garland gives your home a darker Halloween look. Fold black paper into sections, cut small shapes along the edges, and unfold it to reveal a web pattern. This craft works best for adults or older children who can cut detailed shapes safely.
Example: For a medium 5-foot (152 cm) fireplace mantel, hang three large paper webs with small spaces between them.
- Fold square paper into triangles before cutting.
- Leave connecting paper strips along the folded edges.
- Cut small triangles and curves to form the web.
- Open the paper slowly to avoid tearing it.
Style tip: Add a few paper spiders for a creepy display. Keep the webs away from candles and other heat sources.
7. Connected Paper Ghost Chain
A connected ghost chain is an easy project for anyone who wants several decorations from one sheet of paper. Fold white paper into equal sections, draw a simple ghost outline, and cut around it while keeping the hands connected. Open the chain to reveal a row of ghosts.
Example: In a small 3-foot (91 cm) reading corner, a short ghost chain can decorate a bookshelf without taking up useful space.
- Use a pencil to draw the ghost outline.
- Keep the hands or sides joined at the folds.
- Add black eyes with a marker.
- Attach the chain to string if you need extra length.
Budget tip: Plain white printer paper works for a short indoor display, but cardstock will hold its shape better.
8. Vintage Kraft Paper Bunting
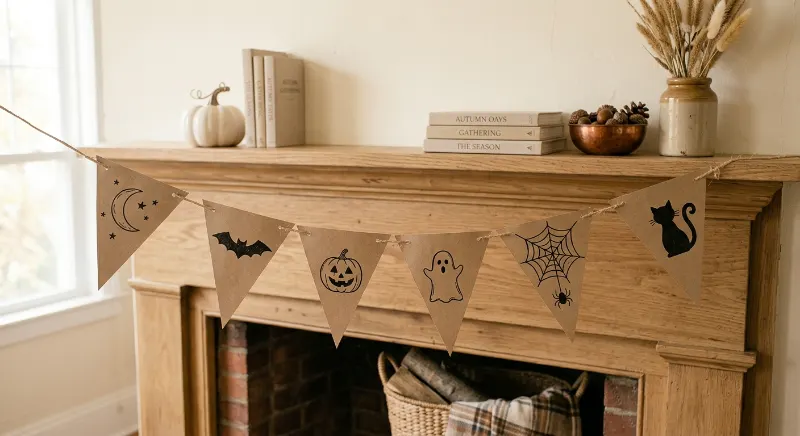
Kraft paper bunting adds a warm, old-fashioned feel to Halloween decor. Its natural brown shade looks good with black lettering, cream paper, and dried autumn colors. Cut simple flags and add words, moons, or small black cats for a rustic display.
Example: For a medium 6-foot (183 cm) dining table, create a brown-paper banner with black bats and cream accents.
- Cut flags from brown kraft paper.
- Use black markers for simple drawings.
- Add white paper circles or small stars.
- Tie the flags to jute twine or cotton string.
Who it suits: This style works well for renters, families, and anyone who prefers farmhouse or vintage decor.
9. Black Cat Silhouette Garland
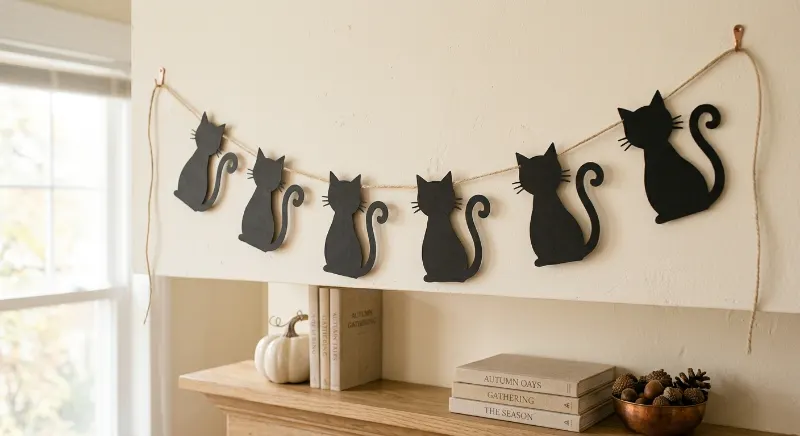
Black cat silhouettes bring a playful, slightly spooky feel to a Halloween room. Cut cat shapes with pointed ears, curved tails, and simple bodies from black cardstock. Attach them to string and hang them against a light-colored wall so each silhouette stands out.
Example: A renter with a small 4-foot (122 cm) entryway shelf can hang six black cats above the shelf for a neat Halloween display.
- Draw a simple cat template before cutting.
- Keep the tail shape wide enough to avoid tearing.
- Use white paper for tiny eyes if you want more detail.
- Space each cat evenly along the string.
Safety tip: If children help, let an adult handle detailed cutting. Keep small paper pieces away from pets.
10. Cutting-Machine Halloween Banner
A cutting machine can help you make clean letters, matching shapes, and detailed Halloween designs. Choose a simple design, cut it from cardstock, and join the pieces with ribbon or string. You can also make the same banner by tracing templates and cutting by hand.
Example: For a medium 5-foot (152 cm) party backdrop, make black letters with orange pumpkins between them.
- Choose a short phrase such as “Happy Halloween.”
- Select cardstock that suits your machine.
- Test one shape before cutting the full design.
- Attach the pieces to ribbon after checking the spacing.
Budget tip: You do not need a cutting machine for this project. Hand-cut shapes work well for basic banners.
11. Skull and Crossbones Paper Chain
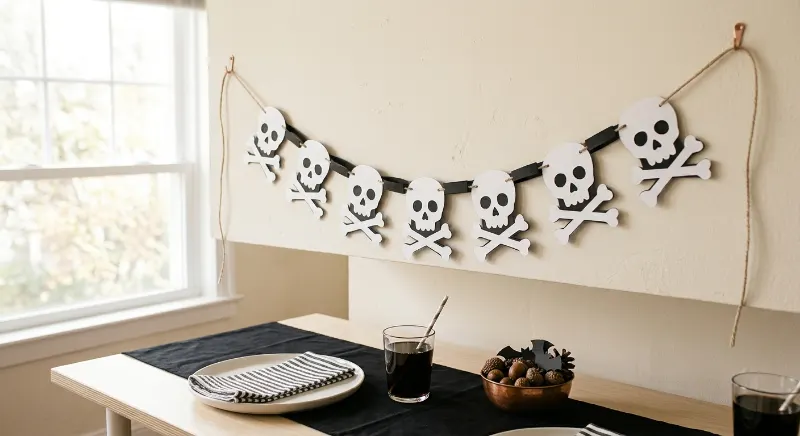
A skull-and-crossbones chain creates a classic spooky look for Halloween parties. Cut matching white skulls and black crossbones, or use a single-color design for a simpler style. Repeat the shapes along a string to make a long decoration for a wall or party table.
Example: In a large 8-foot (244 cm) party area, a black-and-white garland can frame a snack table without adding bulky decorations.
- Draw a simple skull with large eye sockets.
- Cut crossbones from black or white paper.
- Attach the shapes with glue or small paper tabs.
- Add orange flags between the skulls for contrast.
Style tip: Use rounded shapes for a child-friendly display and sharper outlines for a more dramatic theme.
12. Mini Paper Lantern Garland
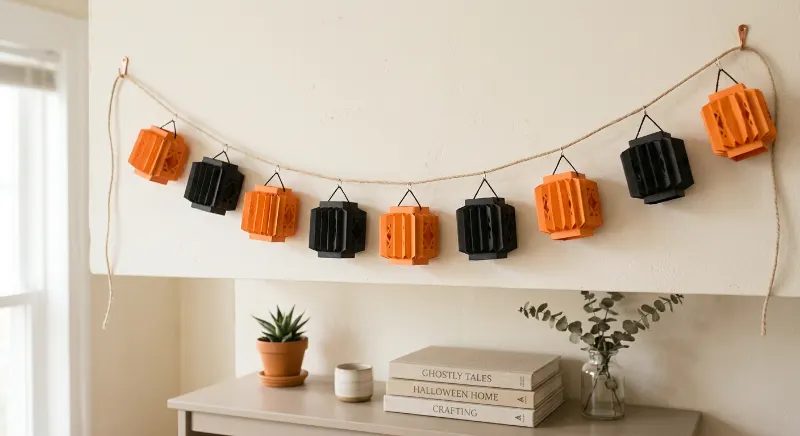
Mini paper lanterns add depth to a Halloween display because their folded sides create a three-dimensional shape. Roll small rectangles into tubes, make vertical cuts without cutting through the top and bottom edges, and gently press the sides outward. Attach each lantern to a separate string.
Example: A medium 6-foot (183 cm) mantel can hold a row of orange and black paper lanterns for a warm, festive look.
- Cut equal paper rectangles.
- Fold each rectangle in half lengthwise.
- Make evenly spaced cuts along the folded edge.
- Unfold, roll into a tube, and secure the ends.
Safety note: Use these as unlit paper decorations. Never place real candles, hot bulbs, or other heat sources inside paper lanterns.
13. Moon and Stars Garland
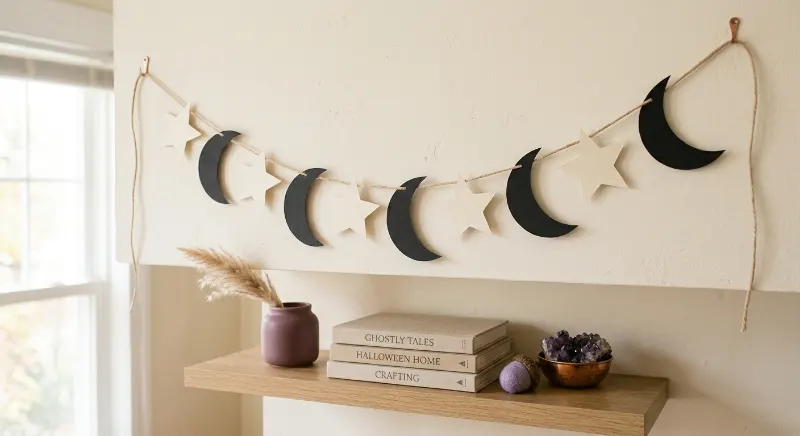
A moon-and-stars garland offers a softer option for people who prefer magical Halloween decor over frightening designs. Cut crescent moons and stars from black, cream, or purple paper, then hang them in an alternating pattern for a balanced display.
Example: For a small 4-foot (122 cm) bedroom wall, use black moons and pale gold paper stars for a calm, night-sky style.
- Draw moon and star shapes with a pencil.
- Cut several pieces from cardstock.
- Attach them to cotton string with small paper tabs.
- Leave equal gaps between each shape.
Budget tip: Use leftover gold gift wrap for small star details. Choose paper without loose glitter if you have pets.
14. Candy Corn Triangle Garland
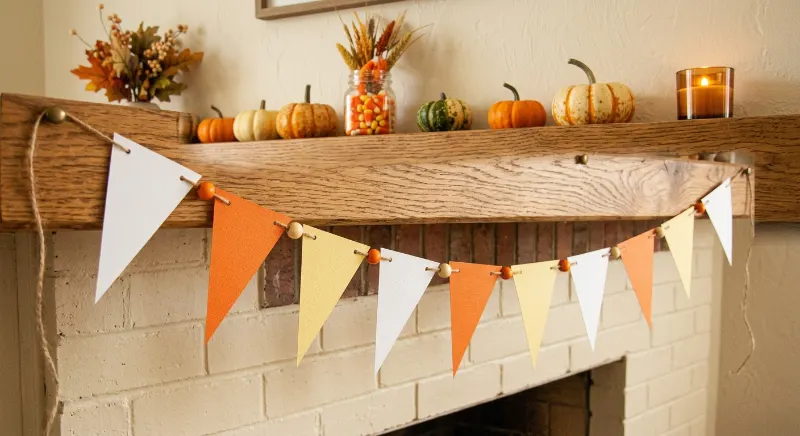
Candy-corn colors bring a cheerful seasonal look to a Halloween banner. Use white, orange, and pale yellow paper to make triangle flags or layered candy shapes. The repeating colors make the design easy to follow, even when you use simple shapes and basic supplies.
Example: A family with a medium 5-foot (152 cm) dining area can hang the banner above a snack table for a colorful party setup.
- Cut matching triangles from three paper colors.
- Arrange them in white, orange, and yellow order.
- Glue the flags onto ribbon or string.
- Add small black bats if you want a spookier finish.
Who it suits: This design works well for families and anyone who likes cute, colorful Halloween decorations.
15. Haunted House Silhouette Banner
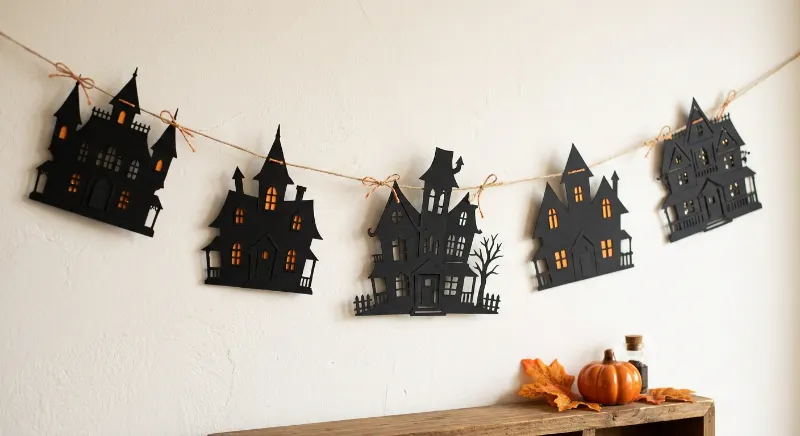
A haunted-house silhouette banner creates a dramatic Halloween scene with very little material. Cut house shapes from black cardstock, then add small windows, chimneys, and pointed roofs. The dark outlines stand out against pale walls and work well with a modern or vintage Halloween theme.
Example: For a medium 6-foot (183 cm) living room wall, make five connected houses with different roof shapes.
- Draw simple house outlines on scrap paper.
- Trace the shapes onto black cardstock.
- Cut small windows before attaching the houses to string.
- Place orange paper behind selected windows for contrast.
Safety note: Use a craft knife only on a cutting mat and keep it away from children.
16. Accordion Bat Garland
Accordion bats add texture and a little movement to a standard paper banner. Fold black paper into small sections, cut matching bat shapes, and open them to create connected or individual folded bats. The raised wings make the decoration more interesting than flat silhouettes.
Example: A renter with a small 3-foot (91 cm) shelf can use four accordion bats to create a simple black display.
- Use lightweight black paper for easy folding.
- Make even folds before cutting.
- Keep the center of each bat wide enough to hold its shape.
- Attach individual bats to string with paper tabs.
Budget tip: Save the paper scraps from each cut to make smaller bats or other decorations.
17. Paper Tassel Garland
Paper tassels are a good choice when you want a Halloween garland without spooky faces or detailed shapes. Cut tissue paper into strips, roll the top section, and twist it into a loop for hanging. Combine black, orange, and purple tassels for a simple party decoration.
Example: For a medium 5-foot (152 cm) party table, make eight tassels and space them evenly along a string.
- Fold tissue paper before cutting strips.
- Leave the top edge uncut for the hanging loop.
- Twist and secure the top with string or tape.
- Mix colors instead of making every tassel identical.
Who it suits: This design suits renters, party hosts, and beginners who prefer quick projects.
18. Mummy Paper Strip Garland
A mummy garland uses white paper strips and simple black eyes to create a fun Halloween decoration. Cut small mummy shapes or wrap white paper strips around a paper body. Leave gaps between the strips so the dark background shows through.
Example: A family decorating a medium 4-foot (122 cm) bookshelf can make a row of five small mummies for a playful Halloween theme.
- Cut white paper into narrow strips.
- Make a rounded body shape from white or gray cardstock.
- Glue the strips across the body in uneven layers.
- Add two black eyes before attaching the mummy to string.
Budget tip: Reuse white paper from old notebooks or packaging, as long as it is clean and easy to cut.
19. Accordion Witch Hat Garland
Witch hats add a classic Halloween detail to walls, mantels, and party tables. Cut hat shapes from black paper, then add small orange or purple bands. For a folded design, connect the hats with narrow paper bridges so they open into a chain.
Example: For a small 4-foot (122 cm) entryway, hang a short row of black hats with purple bands above a console table.
- Draw a pointed hat with a wide brim.
- Cut matching shapes from black cardstock.
- Add a colored paper band around each hat.
- Attach the hats to string or join them with folded paper.
Style tip: Add paper stars if you want a magical look instead of a scary one.
20. Paper Cauldron Bunting
A paper cauldron garland works well for a witch-themed Halloween party. Cut black pot shapes, then add green circles to represent bubbling potion. Purple stars or orange details can help the garland match other decorations in the room.
Example: For a medium 5-foot (152 cm) party wall, hang five cauldrons with green bubbles spaced between them.
- Draw a wide pot shape with two handles.
- Cut the cauldrons from black cardstock.
- Add green circles in different sizes.
- Attach each shape to string with tape or paper tabs.
Safety tip: Keep the paper away from stovetops, candles, and other heat sources.
21. Mixed-Shape Halloween Garland
A mixed-shape garland brings several Halloween symbols together in one decoration. Combine pumpkins, ghosts, bats, stars, or cats, but repeat your colors to keep the display balanced. This idea also helps you use leftover paper from earlier craft projects.
Example: For a medium 6-foot (183 cm) mantel, arrange orange pumpkins, white ghosts, and black bats in a repeating pattern.
- Pick three main colors before cutting.
- Make a small number of each shape.
- Lay out the pieces on a table before attaching them.
- Keep the gaps even and avoid overcrowding the string.
Budget tip: This is a useful way to turn leftover cardstock into a new decoration instead of buying more supplies.
How Do You Hang a Paper Halloween Garland?
The right hanging method helps your garland stay in place without damaging the wall. Choose a method based on the garland’s weight, the wall surface, and whether you rent or own your home. Always test a small area before attaching anything.
Example: A renter with a small 4-foot (122 cm) entryway can hang a lightweight paper chain with removable hooks placed near the two ends.
- Removable hooks: Check the weight limit and wall-surface instructions before use.
- Painter’s tape: Test it on an unseen area first, since some paint finishes may still lift.
- Existing fixtures: Tie string around a curtain rod or shelf bracket when safe.
- Freestanding display: Attach the garland to a shelf, mantel, or party backdrop instead of the wall.
For a longer 8-foot (244 cm) display, add a support point near the center to reduce sagging. Do not attach string to electrical wires, light fixtures, or unstable furniture.
How Can You Make Paper Garlands Last Longer?
Paper decorations can last through several Halloween seasons when you store them carefully. Use sturdy materials for designs you want to reuse, and keep the garland away from moisture, direct sunlight, and heat.
Example: A family with a medium-sized living room can reuse a black bat garland each year by storing it flat in a labeled folder after Halloween.
- Choose cardstock for heavy shapes and detailed cut-outs.
- Let glue dry fully before hanging the garland.
- Avoid placing paper decorations near open windows on windy days.
- Store flat pieces between clean sheets of paper.
- Keep the decorations in a dry box away from pets and young children.
Renter-friendly tip: Take down the garland slowly and follow the removal instructions for your hooks or tape. Avoid pulling decorations directly off painted walls.
Frequently Asked Questions About DIY Halloween Paper Garlands
What paper works best for a Halloween garland?
Cardstock works well for pumpkins, bats, cats, and other shapes that need to hold their form. Construction paper suits simple chains, while tissue paper works best for lightweight tassels. Choose the paper based on the design and how often you want to reuse it.
How long should a Halloween paper garland be?
Measure the space before you start cutting. A 4-foot (122 cm) garland can suit a small shelf, while a 6-foot (183 cm) garland can work above a mantel. Leave extra length at the ends for tying or hanging.
How do I hang a garland without damaging the wall?
Try removable hooks made for your wall surface, or use an existing curtain rod or shelf bracket. Check the product instructions and test the surface first. For delicate paint or wallpaper, a freestanding display may be the safer option.
Can I make Halloween paper garlands with kids?
Yes. Choose simple pumpkins, ghosts, stars, or triangle flags for younger children. Adults should handle scissors for detailed shapes, craft knives, and cutting machines. Keep small cut-outs, string, and other craft supplies away from toddlers and pets.
How do I store paper garlands after Halloween?
Remove the garland carefully and let any glue dry completely. Lay flat paper chains in a folder or shallow storage box. Keep tissue-paper tassels in a separate container so they do not get crushed. Store everything in a dry place away from direct sunlight.
Final Thoughts
DIY Halloween paper garlands offer a simple way to decorate your home without buying expensive seasonal items. Choose pumpkins, ghosts, bats, or stars that match your style and available space. Start with one small project, then add more decorations as you need them.
You can make these crafts with basic supplies and reuse many designs next year. Which paper garland will you make first: a cute pumpkin chain or a spooky bat banner? Pick your favorite, gather your supplies, and start crafting.



- Be Respectful
- Stay Relevant
- Stay Positive
- True Feedback
- Encourage Discussion
- Avoid Spamming
- No Fake News
- Don't Copy-Paste
- No Personal Attacks
- Be Respectful
- Stay Relevant
- Stay Positive
- True Feedback
- Encourage Discussion
- Avoid Spamming
- No Fake News
- Don't Copy-Paste
- No Personal Attacks
